Drilling holes in narrow corners with an electric impact drill can be a challenging task, but with the right techniques, tools, and safety precautions, you can achieve precise and efficient results. This comprehensive guide will provide you with in – depth tips, introduce suitable electric impact drill brands and models, and cover all aspects of this demanding drilling operation.
When it comes to drilling in narrow corners, several challenges present themselves. Firstly, limited space restricts the movement of the electric impact drill. The lack of room makes it difficult to position the drill correctly, maintain a stable grip, and ensure that the drill bit is perpendicular to the surface. This can lead to off – center holes or even damage to the workpiece. Secondly, visibility is often compromised in narrow corners. It becomes hard to see the exact drilling point, making it challenging to mark and start the hole accurately. Additionally, debris and dust generated during drilling can accumulate quickly in the confined space, further obscuring the view and potentially causing safety hazards.
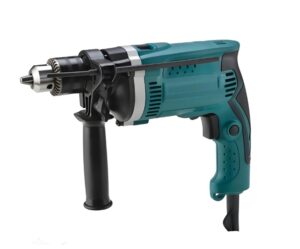
- Size and Compactness: For narrow – corner drilling, a compact and lightweight electric impact drill is essential. Smaller drills are easier to maneuver in tight spaces, allowing you to reach corners that larger models cannot. Look for drills with a shorter body length and a more streamlined design.
- Power and Torque: Adequate power and torque are crucial for efficient drilling. Higher torque values enable the drill to penetrate tough materials, such as hardwood, metal, and concrete, even in confined areas. However, you also need to balance power with control, as too much torque can be difficult to handle in narrow spaces.
- Variable Speed and Reverse Function: A variable – speed feature gives you the flexibility to adjust the drilling speed according to the material and the requirements of the job. The reverse function is useful for removing stuck drill bits or for backing out screws.
- Chuck Size: The chuck size determines the maximum diameter of the drill bit that the drill can hold. For general – purpose narrow – corner drilling, a chuck size of 10 – 13mm is usually sufficient. However, if you plan to use larger drill bits, you may need a drill with a larger chuck.
- LED Lighting: An integrated LED light is a valuable feature, especially when drilling in dark or poorly – lit corners. It illuminates the drilling area, improving visibility and allowing you to mark and start the hole more accurately.
- DeWalt DCD791D2
- Features: This 20V MAX* Lithium – Ion compact drill/driver is extremely popular among professionals and DIY enthusiasts. It has a compact and lightweight design, with a length of only 7.8 inches, making it highly maneuverable in narrow spaces. The high – performance motor delivers 300 unit watts out (UWO), providing plenty of power for drilling through a variety of materials. It offers two – speed settings (0 – 450 RPM and 0 – 1,500 RPM) for precise control, and the 15 + 1 clutch setting helps prevent stripping of screws. The integrated LED light has a 20 – second trigger release delay, ensuring that the work area remains illuminated even after you stop drilling.
- Suitability for Narrow – Corner Drilling: Its compact size allows it to fit into tight corners with ease. The powerful motor and variable – speed settings make it suitable for different materials commonly encountered in narrow – corner drilling projects, such as wood and metal. The LED light significantly improves visibility in dimly – lit corners.
- Makita XFD121Z
- Features: The Makita XFD121Z is a 18V LXT Lithium – Ion Cordless Compact Driver – Drill. It has a very compact design, with a length of just 6.7 inches, which is one of the shortest in its class. Despite its small size, it packs a punch with 480 in.lbs. of max torque. It features a two – speed transmission (0 – 400 RPM and 0 – 1,800 RPM) for versatile operation. The variable 2 – speed trigger and electric brake provide added control. The built – in LED light with afterglow illuminates the work area, enhancing visibility during drilling in tight spaces.
- Suitability for Narrow – Corner Drilling: Its ultra – compact size makes it an ideal choice for drilling in extremely narrow corners. The high torque output ensures that it can handle tough materials, and the variable – speed trigger allows for precise speed adjustments in confined areas. The LED light’s afterglow feature is beneficial as it keeps the area lit for a short while after the trigger is released, giving you time to assess your work.
- Bosch PS31 – 2A
- Features: This 12V Max Lithium – Ion Cordless Drill/Driver Combo Kit is known for its excellent balance of power and compactness. The drill has a length of 7.1 inches and weighs only 2.6 pounds, making it easy to handle in tight spots. It offers two – speed settings (0 – 400 RPM and 0 – 1,300 RPM) and 16 + 1 clutch settings for accurate control. The Bosch exclusive EC Brushless motor provides longer tool life and increased efficiency. The integrated LED light provides bright illumination of the work area, improving visibility during drilling in dark corners.
- Suitability for Narrow – Corner Drilling: Its lightweight and compact design make it highly maneuverable in narrow corners. The brushless motor ensures consistent performance, and the variable – speed and clutch settings allow for precise drilling in different materials. The LED light is a great asset for improving visibility in low – light conditions.
Accurate marking of the drilling point is crucial, especially in narrow corners where visibility may be limited. Use a sharp pencil or a center punch to mark the exact location where you want to drill the hole. If possible, use a square or a level to ensure that the mark is in the correct position and at the right angle. In cases where the corner is too dark to see clearly, you can use a mirror or a small flashlight to help you mark the point accurately.
The choice of drill bit depends on the material you are drilling. For wood, twist drill bits are commonly used. They come in a variety of sizes and types, such as standard twist drill bits, brad – point drill bits, and spade bits. Brad – point drill bits are ideal for making clean, precise holes in wood as they prevent the bit from wandering. For metal, high – speed steel (HSS) drill bits are recommended. They can withstand the high temperatures generated during metal drilling. Cobalt drill bits are even more suitable for drilling hard metals, such as stainless steel, as they have higher heat resistance. When drilling concrete, masonry drill bits with carbide tips are the best option. These bits are designed to break up the hard concrete surface efficiently.
Before drilling, it is essential to secure the workpiece firmly. In a narrow corner, this can be a bit tricky. You can use clamps, screws, or nails to hold the workpiece in place. If the workpiece is too large to be clamped, you can try to brace it against a stable surface. Make sure that the workpiece does not move during drilling, as any movement can cause the drill bit to wander, resulting in an inaccurate hole or damage to the workpiece.
Starting the hole in a narrow corner requires extra care. Hold the electric impact drill with a firm but relaxed grip. Position the drill bit on the marked point and start the drill at a low speed. Apply gentle pressure and slowly increase the speed as the drill bit begins to penetrate the material. If the drill bit starts to wander, stop the drill immediately, reposition the bit, and start again. You can also use a center punch to create a small indentation at the drilling point before starting to drill. This helps the drill bit to stay in place and prevents it from wandering.
In a narrow corner, maintaining a stable grip on the electric impact drill is crucial. Use both hands to hold the drill, if possible. One hand should hold the handle, while the other can support the body of the drill or the workpiece. Keep your arms and wrists in a comfortable position to avoid fatigue and loss of control. As you drill, be aware of the position of your hands and arms to ensure that they do not get in the way of the drill bit or the workpiece.
Ensuring that the drill bit is perpendicular to the surface is essential for accurate hole drilling. In a narrow corner, it can be difficult to judge the angle. You can use a small level or a square to check the angle of the drill bit as you drill. If the angle is off, stop the drill, adjust the position of the drill, and start again. Another technique is to mark a reference line on the workpiece or the drill itself to help you maintain the correct angle.
Debris and dust can quickly accumulate in a narrow corner during drilling, obstructing your view and potentially causing safety hazards. To deal with this, you can use a vacuum cleaner with a narrow – nozzle attachment to suck up the debris as you drill. Alternatively, you can use a brush to periodically clear the debris from the drilling area. Make sure to wear safety goggles to protect your eyes from flying debris.
- Wear Protective Gear: Always wear safety goggles to protect your eyes from flying debris. In addition, wear work gloves to protect your hands from sharp edges and to improve your grip on the drill. If you are drilling in a noisy environment, wear ear protection to prevent hearing damage.
- Check the Drill for Damage: Before using the electric impact drill, check it for any signs of damage, such as frayed cords (if it is a corded drill), damaged switches, or loose parts. Do not use a damaged drill, as it can pose a serious safety risk.
- Unplug or Remove the Battery: When changing drill bits, cleaning the drill, or making any adjustments, always unplug the corded drill or remove the battery from the cordless drill to prevent accidental starting.
- Follow the Manufacturer’s Instructions: Read and follow the manufacturer’s instructions for using the electric impact drill carefully. Different models may have specific operating procedures and safety guidelines that you need to follow.
If the drill bit starts to wander while drilling in a narrow corner, it could be due to several reasons. The drilling point may not be marked accurately, or the drill bit may not be positioned correctly. To fix this, stop the drill, re – mark the drilling point if necessary, and reposition the drill bit. Make sure that the drill bit is centered on the mark and perpendicular to the surface. You can also use a center punch to create a small indentation at the drilling point to help the drill bit stay in place.
Overheating of the electric impact drill can occur, especially if you are drilling through tough materials for an extended period. To prevent overheating, take breaks periodically to allow the drill to cool down. You can also reduce the drilling speed or apply less pressure if the drill starts to overheat. If the drill continues to overheat, stop using it immediately and let it cool down completely before resuming the drilling operation.
A drill bit can get stuck in the workpiece, especially when drilling in hard materials or when the drill bit becomes dull. To remove a stuck drill bit, first, try reversing the drill. If this does not work, you can use a pair of pliers to grip the drill bit and gently twist it to loosen it. In some cases, you may need to use a drill bit extractor tool to remove the stuck bit.
Drilling holes in narrow corners with an electric impact drill requires a combination of the right tools, proper techniques, and strict adherence to safety precautions. By understanding the challenges, selecting the appropriate electric impact drill model, preparing thoroughly, using the correct drilling techniques, and taking safety seriously, you can successfully complete your drilling projects in even the most confined spaces. Remember to always practice and be patient, as mastering the art of narrow – corner drilling takes time and experience. If you have any further questions or encounter specific problems during your drilling operations, consult the manufacturer’s support or seek advice from experienced professionals.
