Our Location
304 North Cardinal St.
Dorchester Center, MA 02124
304 North Cardinal St.
Dorchester Center, MA 02124
Installing the rubber sleeve of an impact drill bit may appear like a minor step in tool preparation, but in reality, it is a process that directly affects the efficiency, safety, and lifespan of both the drill and the drill bit. The rubber sleeve plays a crucial role in ensuring the bit is secured firmly, prevents unnecessary slippage during drilling, protects the bit shank from premature wear, and provides the operator with better control, particularly when working on heavy-duty construction materials like concrete, masonry, or reinforced steel. In the world of impact drills, where hammering action combines with rotational force, precision in every setup stage matters. To properly understand how to install the rubber sleeve on an impact drill bit, it is important to first appreciate the function of the sleeve, the types of sleeves available, and the common installation practices across popular global brands such as Bosch, Makita, DeWalt, Hilti, Milwaukee, and Hitachi/Metabo HPT. Each of these brands offers slightly different designs of impact drill chucks and accessories, so their models demonstrate practical variations in the installation process.
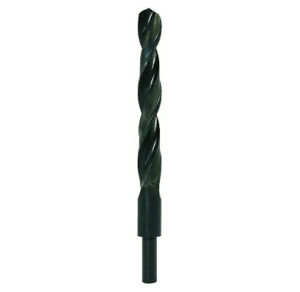
The rubber sleeve itself is a cylindrical covering made from durable, heat-resistant rubber or composite elastomers that slide over the shank of the impact drill bit or over the quick-change chuck mechanism of the drill. Its primary function is to ensure secure placement of the bit, absorb vibrations, and provide a comfortable grip when changing bits by hand. Some sleeves are removable and interchangeable, while others are integrated into quick-change chucks or SDS-plus/SDS-max holders. For example, the Bosch SDS-plus Bulldog Xtreme Rotary Hammer series (model GBH2-28L) is designed with a quick-insertion chuck and a rubber sleeve that must be properly fitted around the drill bit shank to maximize its hammer drilling performance. Likewise, Makita HR2475 1-inch Rotary Hammer uses a rubber sleeve in its SDS chuck system to help lock bits in place securely.
When approaching the installation process, users need to begin with careful preparation. The drill should always be powered off and unplugged if it is corded, or the battery removed if it is cordless. Brands such as DeWalt DCD996B 20V MAX XR Hammer Drill emphasize the importance of disconnecting power to avoid accidental triggering, as their models are equipped with powerful brushless motors that can start unexpectedly if the trigger is pressed accidentally. Once the drill is safe, the user should clean both the bit shank and the rubber sleeve to remove dust, grease, or metal shavings. In heavy construction sites, impact drill bits are often used with concrete dust present, so cleaning is critical.
To install the rubber sleeve, one should align the sleeve with the shank or the collar of the bit. Depending on the brand, the method differs slightly. For Hilti TE 7-C Rotary Hammer Drill, the sleeve is pressed over the shank until it clicks into place inside the chuck, providing a tight seal. With Milwaukee M18 FUEL 2712-20 SDS-plus rotary hammer, the sleeve is designed to compress slightly, ensuring the bit does not wobble under hammering action. The pressure applied must be firm but controlled, as forcing the sleeve incorrectly can cause deformation, leading to poor performance or even damage to the chuck.
Another important consideration during installation is lubrication. Many manufacturers, including Bosch and Makita, recommend applying a small amount of lubricant or specialized drill chuck grease to the shank of the bit before sliding on the rubber sleeve. This prevents the sleeve from wearing out prematurely and ensures smoother bit insertion. For example, Bosch SDS-Plus Grease Tube (model 1615430005) is often advised to be used when inserting sleeves and bits into Bosch SDS systems. The lubrication reduces friction and protects against heat buildup caused by constant hammering.
Brands design their sleeves with unique locking systems. For instance, Metabo HPT DH26PF 1-inch Rotary Hammer uses a keyed chuck with a rubber sleeve that tightens when rotated clockwise, while Makita XRH04Z 18V LXT Lithium-Ion Cordless Rotary Hammer has a push-and-click sleeve that requires the operator to insert the bit until it locks automatically. Understanding these mechanisms is key because improper installation may result in the bit loosening during use, creating hazards. The rubber sleeve is not just for security—it also serves as a shock absorber. When drilling into reinforced concrete, the constant vibration can travel up the bit shank into the chuck. Without the sleeve, the operator may feel excessive vibration in their hands, reducing comfort and increasing fatigue.
Practical installation also involves routine inspection. Before fitting the rubber sleeve, the user should check for cracks, tears, or deformation. For example, with DeWalt DW5735 3/4-Inch by 12-Inch SDS-Max Drill Bit, if the sleeve shows signs of damage, it should be replaced before installation. Using a worn sleeve can cause wobbling and loss of drilling accuracy. Many professionals keep spare sleeves, as brands like Hilti and Bosch sell replacement kits specifically for their drill models. For example, Hilti Chuck Rubber Sleeve Replacement Kit (Part 233478) is compatible with their TE series rotary hammers, and it comes with instructions for safe installation.
After placing the rubber sleeve properly, it is crucial to test the bit’s stability before actual drilling begins. The operator should pull gently on the drill bit to ensure it is locked and the sleeve is holding it firmly. With tools like Milwaukee M18 FUEL 2804-20 Hammer Drill, the sleeve system provides audible clicks when the bit is seated correctly. This confirmation sound assures the user that installation is secure. Failure to verify this may result in the bit flying out at high speed during use, a common mistake among beginners.
Some impact drills also feature interchangeable chucks, where the rubber sleeve is integrated into the adapter. For instance, the Bosch GBH18V-26DK15 18V Bulldog Rotary Hammer offers quick-change chucks for both SDS-plus and standard cylindrical bits, requiring users to install a rubber sleeve over the adapter when switching between different bit types. This versatility demonstrates why understanding sleeve installation is critical, as improper fitting can compromise the performance of both systems.
From a maintenance perspective, the rubber sleeve should be kept free of debris after every use. Professionals often use compressed air or a clean cloth to wipe away fine concrete dust, which is abrasive and can shorten the sleeve’s lifespan. Brands like Makita and Hilti also recommend storing drill bits with their sleeves installed in protective cases, such as the Makita 196684-9 Drill Bit Storage Case, which prevents damage during transport. By caring for the rubber sleeve properly, the user extends not only the life of the sleeve but also the overall effectiveness of their impact drill system.
The process of installation becomes even more specific when considering larger SDS-max drills versus smaller SDS-plus systems. In SDS-max drills such as Hilti TE 60-ATC/AVR or Bosch GBH5-40DCE, the rubber sleeves are thicker and require a firmer press into the chuck. These models handle higher torque and deeper drilling applications, so their sleeves are engineered to withstand greater stress. By contrast, SDS-plus systems like Makita HR2470F use slimmer sleeves, easier to install with one hand, making them more suitable for general-purpose masonry drilling.
Another point worth emphasizing is operator safety. Manufacturers like DeWalt and Milwaukee highlight in their manuals that the rubber sleeve must always be correctly seated before use. This is because improperly fitted sleeves can allow dust and fragments to enter the chuck mechanism, leading to jamming. The DeWalt DCH273B 20V Max Brushless SDS Rotary Hammer comes with a dust extraction system that works best when the sleeve is properly installed, ensuring an airtight seal around the bit entry point.
Beyond installation, many professionals want to know when to replace the rubber sleeve. General guidance across brands indicates that sleeves should be replaced if they show visible wear, if bits start to wobble, or if insertion and removal become difficult. For instance, Bosch advises replacing sleeves after approximately 200–300 hours of heavy drilling, while Hilti suggests inspecting sleeves after every major project. Fortunately, replacement is relatively inexpensive and easy to do, with parts like the Bosch 1615430010 Rubber Sleeve Replacement readily available.
In conclusion, installing the rubber sleeve of an impact drill bit is a procedure that requires attention to detail, an understanding of the specific drill model being used, and adherence to safety practices. Different brands such as Bosch, Makita, DeWalt, Hilti, Milwaukee, and Metabo HPT offer slight variations in sleeve designs and locking mechanisms, but the underlying principles remain the same: clean the shank, align the sleeve, press or rotate it into position, lubricate if recommended, inspect for damage, and test for secure locking. By following these steps carefully, operators not only maximize the efficiency and precision of their drilling but also extend the life of their tools and protect themselves from potential hazards. The rubber sleeve, though a small accessory, embodies the philosophy that every detail in tool maintenance contributes to overall performance. For both professionals and DIY users, mastering the installation of this component is an investment in safe, reliable, and long-lasting drilling operations.
