Our Location
304 North Cardinal St.
Dorchester Center, MA 02124
304 North Cardinal St.
Dorchester Center, MA 02124
Introduction to Electric Screwdrivers and Electric Drills
Electric screwdrivers and electric drills are among the most essential tools used in both home DIY tasks and professional construction work. Their versatility makes them indispensable for tasks such as screwing, drilling into wood, metal, plastic, and even concrete. Changing the drill bit is a fundamental skill that every user should master to maximize efficiency, safety, and tool longevity. This comprehensive guide aims to explain the detailed procedures for changing drill bits in electric screwdrivers and electric drills, offering brand-specific instructions, technical nuances, and model-based variations.
Understanding Drill Bits and Their Types
Drill bits are the detachable tips of electric screwdrivers and electric drills that perform the actual cutting or screwing. Different drill bits serve different functions, and choosing the correct one is essential for the success of any job. The most common types of drill bits include twist drill bits, masonry bits, spade bits, brad-point bits, and hex-shank screwdriver bits. Twist drill bits are ideal for general-purpose drilling in wood and metal. Masonry bits have a carbide tip designed to drill into stone, brick, and concrete. Spade bits are broad and flat, suitable for drilling large holes in wood. Brad-point bits provide precision in woodworking tasks. Screwdriver bits such as Phillips, flat-head, Torx, and hex are designed for inserting or removing screws and are commonly used with electric screwdrivers. Each type of bit has a specific shank design which must match the chuck mechanism of the tool.
Electric Screwdrivers: Bit Changing Procedures
Electric screwdrivers come in various forms, from compact rechargeable models for household tasks to more robust industrial variants. The mechanism for changing bits is generally simpler than that of electric drills. Most electric screwdrivers use a magnetic bit holder or a quick-change chuck system. To change a bit in an electric screwdriver, first ensure the power is turned off or the tool is unplugged. This is vital for safety. Hold the tool firmly and locate the chuck—the part that holds the bit in place. In many compact models like the BLACK+DECKER LI4000, the chuck is magnetic. Simply pull the old bit straight out using your fingers. To insert a new bit, align it with the hole in the chuck and push it in until it clicks into place. For models like the Bosch GO 2, which feature a hex-shank quick-change chuck, pull back the collar around the chuck, remove the existing bit, insert the new one, and release the collar to secure it. Always give the new bit a gentle tug to ensure it is locked in position.
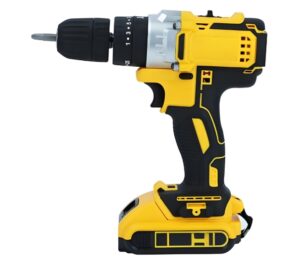
Electric Drills: Bit Changing Procedures for Keyless Chucks
Most modern electric drills use keyless chucks, which allow users to change bits quickly without additional tools. Brands like DeWalt, Makita, and Milwaukee manufacture models with high-quality keyless chucks. For example, the DeWalt DCD791D2 features a ratcheting keyless chuck. To change a drill bit in such a model, first power off the drill or remove the battery. Hold the drill with one hand and grip the chuck with the other. Turn the chuck counterclockwise to open the jaws. As the jaws expand, the old bit becomes loose and can be removed. Insert the new bit into the chuck as far as it will go, then tighten the chuck by turning it clockwise. Some drills automatically click when the bit is securely tightened. After inserting the bit, it’s important to perform a spin test—turn the drill on at a low speed and observe if the bit wobbles. If it does, reinsert and tighten.
Electric Drills: Bit Changing Procedures for Keyed Chucks
Older electric drills or heavy-duty models may still use a keyed chuck system, especially in models designed for heavy-duty masonry or metalwork. These chucks require a separate key to loosen or tighten the jaws. A great example is the Makita 6302H, a corded electric drill known for its torque and durability. To change a bit in a keyed chuck, first ensure the drill is unplugged. Insert the chuck key into the hole on the side of the chuck and turn it counterclockwise. This will loosen the jaws and release the bit. Remove the old bit and insert the new one, then turn the chuck key clockwise until the jaws firmly grip the bit. Double-check by gently tugging the bit to ensure it’s secure.
Impact Drivers and Bit Holders
While not traditional drills, many users use impact drivers interchangeably with electric screwdrivers. Models such as the Milwaukee M18 Fuel 2853-20 and the DeWalt DCF887B use a collet-style quick-release system. To change the bit in an impact driver, pull the collar forward, remove the old bit, insert the new one, and release the collar. The bit should snap into place securely. Impact drivers require specially designed hex-shank bits that are engineered to handle the high torque these tools deliver. Attempting to use standard drill bits in an impact driver can damage the tool or the bit.
Safety Considerations When Changing Drill Bits
Changing drill bits might seem simple, but improper handling can lead to injury or tool damage. Always turn off the power or disconnect the battery before touching the chuck. Use gloves if the bit has been recently used, as it may be hot. When using keyed chucks, ensure the chuck key is removed from the drill before operating it. Failure to do so can result in the key flying out at high speed, posing a safety hazard. Ensure the drill bit is compatible with the material being drilled. Using a wood bit on metal, for example, can dull the bit quickly or even break it.
Tips for Ensuring Longevity of Drill Bits and Tools
Proper maintenance extends the life of both your drill and your drill bits. After use, clean the bits with a dry cloth to remove dust and debris. Store bits in a designated bit holder or case to prevent them from rusting or dulling. Use a small amount of oil on metal bits after use to prevent corrosion. Periodically check the chuck for wear and tear. A worn-out chuck may fail to hold bits securely, leading to poor drilling performance or accidents. For professional users who switch bits frequently, consider using tools like the Bosch GSR12V-300HXN, which feature high-efficiency bit locking mechanisms and are optimized for durability.
Brand and Model Recommendations for Electric Screwdrivers
When selecting an electric screwdriver, users should consider both performance and ergonomics. The BLACK+DECKER LI4000 is ideal for homeowners, featuring a 3.6V lithium battery and a magnetic bit holder. The Bosch GO 2 stands out in the professional space with a smart push-and-go mechanism and USB-C charging. Makita DF012DSE is a high-end 7.2V cordless screwdriver that can convert from pistol grip to straight design and includes a clutch for torque control. The Wowstick 1F+, although a micro screwdriver, is excellent for precision electronics work, with over 50 bits included. The WORX WX255L SD is unique with a screw holder attachment and rotating bit cartridge.
Brand and Model Recommendations for Electric Drills
The DeWalt DCD796D2 20V MAX XR cordless drill/driver combines power, ergonomics, and durability. The Makita XFD131 offers a brushless motor and all-metal chuck. Milwaukee M18 2801-20 is renowned for its compact size and strong torque output. For corded options, the Bosch 1006VSR is lightweight and reliable for everyday use, while the Makita 6302H is ideal for continuous heavy-duty tasks. The Ryobi P215K1 offers affordability and is suitable for DIY users. Hilti SF 4-A22 is a premium choice used in construction industries for its unmatched durability and power.
Common Problems When Changing Bits and Their Solutions
Sometimes users struggle with stuck bits or chucks that won’t loosen. For keyless chucks, apply a few drops of penetrating oil like WD-40 and gently tap the chuck with a rubber mallet to loosen it. For magnetic chucks with metal shavings, use a strong magnet or compressed air to clean out debris. In quick-change systems, ensure that the locking mechanism isn’t jammed—often caused by dirt buildup. Clean with a soft brush and reapply lubricant if necessary. In cases where the bit is broken off inside the chuck, use needle-nose pliers to grip and remove it or seek assistance from a tool technician.
How Frequently Should Bits Be Changed
Bit changing frequency depends on the task. For screw-driving applications, you may change bits every few minutes if you switch between screw types. For drilling, bits should be changed when you move to different materials or when the bit becomes dull. A dull bit produces more heat, reduces drilling speed, and increases the risk of motor burnout. Professionals often carry multiple pre-inserted bits on magnetic bit holders or wear bit belts for speed. Some models like the WORX WX176L Switchdriver include dual chucks allowing users to alternate between two bits without changing.
Maintenance of the Chuck Mechanism
To keep the chuck in good working condition, regularly clean it using a toothbrush or a compressed air canister. For keyed chucks, lubricate the gear teeth occasionally to ensure smooth operation. For keyless chucks, avoid overtightening which may damage the internal jaws. If the chuck becomes misaligned or difficult to operate, consider replacing it. Most chucks are screw-mounted and can be removed with a hex wrench inserted inside the chuck and turned counterclockwise. Always consult the tool’s manual or a professional technician if you are unsure about replacing the chuck yourself.
Conclusion: Mastering the Skill for Productivity and Safety
Changing the drill bit of an electric screwdriver or electric drill is a fundamental yet essential task that every user must know. Whether you’re a professional contractor working with a DeWalt DCD998 on a construction site or a homeowner using a BLACK+DECKER BDCS20C for light assembly work, mastering the process ensures efficient operation and long-term tool performance. With a wide range of brands and models available in the market, understanding the differences in chuck mechanisms and bit types can significantly enhance your workflow. Regular maintenance and proper handling not only prolong tool life but also prevent accidents and ensure safety. By following the detailed instructions and brand-specific guidelines presented in this comprehensive guide, users can confidently and safely change drill bits, no matter the complexity of the tool or the task at hand.
