When dealing with a faulty second-hand electric impact drill, a systematic approach to troubleshooting can help identify and resolve issues efficiently. This guide will walk you through the process step by step, covering various aspects from common problems to specific brand – and – model – related considerations.
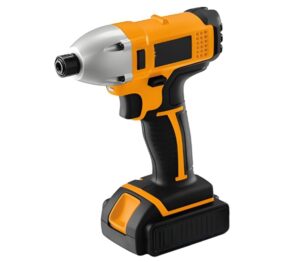
An electric impact drill is a powerful tool that combines the functions of a traditional drill and an impact driver. It works by delivering high – torque rotational force along with rapid impacts, making it ideal for tasks such as drilling through tough materials like concrete, brick, and metal, as well as driving large screws and bolts.
- Motor: This is the heart of the drill, converting electrical energy into mechanical energy to power the rotation and impact mechanisms. Different motors have varying power ratings, typically measured in watts or amps. For example, a more powerful motor can handle harder materials and larger drill bits.
- Gearbox: Transmits the power from the motor to the chuck, often providing different speed and torque settings. High – speed settings are suitable for drilling holes in softer materials, while low – speed, high – torque settings are better for driving screws or drilling in hard materials.
- Impact Mechanism: In an impact drill, this mechanism creates a series of rapid blows, which helps to break up the material being drilled or driven into, reducing the amount of torque needed to penetrate the surface.
- Chuck: Holds the drill bit or driver bit in place. There are different types of chucks, such as keyed chucks that require a special key to tighten and loosen the bit, and keyless chucks that can be adjusted by hand.
Second – hand tools may have a variety of problems due to previous usage, wear and tear, or improper maintenance.
- Cord – Related Issues: If the drill is corded, a damaged power cord is a common culprit. Inspect the entire length of the cord for cuts, frays, or exposed wires. For example, in older models like the Bosch PS31 – 2A, the cord may become brittle over time due to repeated bending. A loose or damaged plug can also prevent power from reaching the drill. Check for any signs of damage at the plug end, and make sure it is properly inserted into the outlet.
- Switch Malfunction: The on/off switch can wear out or become defective. Try toggling the switch multiple times to see if it makes contact. Some drills, like the DeWalt DCD771, have a more complex switch assembly that may require disassembly for a more thorough inspection.
- Motor Failure: A burned – out motor will result in no power. Listen for any unusual noises when attempting to turn on the drill. If you hear a humming sound but no rotation, it could indicate a problem with the motor windings. Motors in Makita XFD101 cordless drills can sometimes fail due to overheating caused by extended use without proper cooling.
- Impact Mechanism Wear: The internal components of the impact mechanism, such as the hammer and anvil, can wear down over time. In Milwaukee M18 Fuel impact drills, the impact mechanism is a complex system of gears and hammers. If the impact is weak or non – existent, these components may be damaged or worn. Check for any visible signs of wear, such as excessive play or broken parts.
- Lubrication Issues: Lack of proper lubrication can cause the impact mechanism to function poorly. Some impact drills, like the Ryobi P238, require periodic lubrication of the impact components. If the drill has not been maintained properly, the moving parts may become dry and grind against each other, reducing the impact force.
- Air Leakage (in Pneumatic Impact Drills): For pneumatic impact drills, air leakage in the hoses or connections can lead to a loss of impact power. Check all air hoses for cracks or loose fittings. In some industrial – grade pneumatic drills, like the Ingersoll Rand W3153, air leakage can be a common problem if the hoses are not regularly inspected and replaced.
- Unbalanced Chuck or Bit: A misaligned or unbalanced drill bit in the chuck can cause excessive vibration. Make sure the bit is properly centered in the chuck. For example, if you are using a long or heavy – duty bit in a Black & Decker BDCDD12C drill, improper seating in the chuck can lead to vibration issues.
- Worn – Out Bearings: The bearings in the drill’s motor or gearbox can wear out over time, causing the drill to vibrate. Listen for a grinding or rumbling noise, which may indicate bearing failure. In Hitachi DS18DGL cordless drills, worn – out bearings are a common cause of excessive vibration.
- Damaged Gearbox: A damaged or misaligned gear in the gearbox can also result in vibration. Inspect the gearbox for any signs of damage, such as broken teeth or excessive play between the gears.
- Bosch PS31 – 2A: This cordless impact drill is a popular choice among DIY enthusiasts and professionals alike. It features a 12 – volt lithium – ion battery, providing long – lasting power. The two – speed gearbox allows for different applications, with a high – speed setting for drilling and a low – speed, high – torque setting for driving screws. Common issues with this model include battery degradation over time, which can be addressed by replacing the battery pack. The chuck may also become loose, and it can be tightened using the appropriate key.
- Bosch 11255VSR: A corded model, the 11255VSR is known for its power and durability. It has a 7.5 – amp motor and a variable – speed trigger, allowing for precise control. One common problem with this drill is that the brushes in the motor may wear out, resulting in reduced performance or no power. Replacing the brushes is a relatively straightforward process that can often be done at home.
- DeWalt DCD771: This 20 – volt MAX lithium – ion cordless drill is highly regarded for its performance and reliability. It offers a compact and lightweight design, making it easy to handle in various applications. The drill’s LED work light helps illuminate the work area. However, users may encounter issues with the battery charger not properly charging the battery. In such cases, checking the charger connections and replacing the charger if necessary can solve the problem.
- DeWalt DWD024: A corded drill, the DWD024 has a powerful 8.0 – amp motor and a keyless chuck for quick bit changes. One of the potential problems with this model is that the switch may fail, and it can be replaced by following the manufacturer’s instructions for disassembly and reassembly.
- Makita XFD101: This 18 – volt LXT lithium – ion cordless drill is known for its high – performance motor and long – battery life. It features a 2 – speed transmission and a built – in LED job light. A common issue with this drill is that the impact mechanism may become noisy or less effective over time. This can be due to lack of lubrication or wear and tear on the internal components. Regular lubrication and, if necessary, component replacement can address this problem.
- Makita HR2475: A corded rotary hammer drill, the HR2475 is designed for heavy – duty applications such as drilling in concrete. It has a 9.0 – amp motor and a 3 – mode operation (rotation only, hammering only, and rotation with hammering). Problems with this drill may include the chisel holder becoming loose, which can be tightened using the appropriate tool.
- Milwaukee M18 Fuel: This cordless impact drill is part of Milwaukee’s high – performance M18 Fuel series. It features a brushless motor, which offers longer tool life and increased efficiency. The drill has a high – torque output, making it suitable for tough jobs. One potential issue is that the battery may overheat during extended use, especially in high – load applications. Allowing the battery to cool down and using proper charging practices can prevent this problem.
- Milwaukee 0245 – 20: A corded drill, the 0245 – 20 has a 6.0 – amp motor and a variable – speed trigger. It is a reliable option for general – purpose drilling and driving tasks. However, the gearbox may experience wear over time, resulting in reduced performance or unusual noises. Inspecting and, if needed, replacing the gears can solve this issue.
- Ryobi P238: This 18 – volt ONE+ cordless drill is a budget – friendly option that still offers good performance. It has a two – speed gearbox and a keyless chuck. A common problem with this drill is that the battery may not hold a charge for very long. Replacing the battery or ensuring proper charging techniques can help improve battery life.
- Ryobi CDI1800: A corded drill, the CDI1800 has an 8.0 – amp motor and a variable – speed control. The drill may experience issues with the cord becoming damaged, and in such cases, the cord can be replaced following safety procedures.
- Exterior: Start by examining the outside of the drill. Look for any visible signs of damage, such as cracks in the housing, loose screws, or bent parts. Check the power cord (if corded) for cuts, frays, or exposed wires. For cordless drills, inspect the battery and its connections for any signs of corrosion or damage.
- Chuck and Bits: Inspect the chuck to make sure it is in good condition and can properly grip the drill bits. Check the bits themselves for wear, breakage, or improper seating in the chuck. A damaged bit can cause poor performance or even damage the drill.
- Corded Drills: Plug the drill into a working outlet and try turning it on using the on/off switch. Listen for any unusual noises, such as humming, grinding, or rattling. Observe if the drill rotates smoothly and at the expected speeds. If there is no power, check the outlet by plugging in another device. If the outlet is working, move on to checking the power cord, switch, and motor.
- Cordless Drills: Insert a fully charged battery into the drill and turn it on. Check if the drill powers up and operates as expected. If the drill does not turn on, try charging the battery again or using a different battery (if available). If the problem persists, the issue may lie with the battery compartment connections, the switch, or the motor.
- Impact Testing: For impact drills, test the impact function by holding the drill against a hard surface (such as a concrete block) and turning it on. You should feel a series of rapid impacts. If the impact is weak or non – existent, refer to the section on “Weak or No Impact” above for possible causes and solutions.
- Torque Testing: Test the torque by attempting to drive a screw into a piece of wood or other suitable material. If the drill struggles to drive the screw or does not provide enough torque, check the gearbox settings and make sure the drill is in the appropriate torque – setting mode. Also, inspect the gearbox for any signs of damage or wear.
- Vibration: While the drill is running, hold it firmly and feel for any excessive vibration. If the vibration is severe, check for an unbalanced chuck or bit, worn – out bearings, or a damaged gearbox as described in the “Excessive Vibration” section.
- Noise: Listen carefully to the sounds the drill makes during operation. Unusual noises, such as high – pitched whining, clicking, or rattling, can indicate problems with the motor, gearbox, or impact mechanism. Compare the noise to the normal operating sound of the drill (if you are familiar with it) to help identify the source of the problem.
- Safety First: Before disassembling the drill, make sure it is unplugged (for corded drills) or the battery is removed (for cordless drills). Refer to the manufacturer’s user manual for specific disassembly instructions, as different drills may have different procedures.
- Component Inspection: Once disassembled, inspect the internal components such as the motor, gearbox, impact mechanism, and bearings. Look for signs of wear, damage, or loose parts. For example, check the brushes in the motor for wear and replace them if they are worn down. Inspect the gears in the gearbox for broken teeth or excessive play.
- Regular Cleaning: Keep the drill clean by removing dust, debris, and metal shavings after each use. Use a soft brush or compressed air to clean the exterior and interior of the drill, especially the chuck and ventilation openings.
- Lubrication: Follow the manufacturer’s recommendations for lubricating the drill’s moving parts, such as the impact mechanism and gearbox. Use the appropriate lubricant and apply it at the recommended intervals.
- Battery Care (for cordless drills): Charge the battery according to the manufacturer’s instructions. Avoid overcharging or undercharging the battery, as this can reduce its lifespan. Store the battery in a cool, dry place when not in use.
- Bit Maintenance: Keep your drill bits sharp and clean. Dull bits can cause the drill to work harder, leading to increased wear and potential damage. Replace worn – out bits as needed.
Troubleshooting a faulty second – hand electric impact drill requires a combination of knowledge about the tool’s components, an understanding of common issues, and a systematic approach to testing and inspection. By following the steps outlined in this guide and being familiar with the characteristics of popular brands and models, you can often identify and resolve problems, getting your impact drill back in working order. If you are still unable to fix the problem after thorough troubleshooting, it may be advisable to seek the help of a professional tool repair service.
