How to Remove a Stuck Impact Drill Bit: A Comprehensive Guide
When an impact drill bit becomes stuck in its chuck, it can be a frustrating and time-consuming issue to resolve. Whether you’re a professional contractor or a DIY enthusiast, knowing the right techniques and tools to safely remove a stuck bit is essential. This guide will walk you through various methods, highlight specific brand and model considerations, and provide tips to prevent future occurrences.
Understanding Why Impact Drill Bits Get Stuck
Before diving into removal techniques, it’s important to understand why impact drill bits become stuck in the first place. Several factors can contribute to this problem:
- Over-Tightening: Applying excessive force when securing the bit can cause it to become wedged tightly in the chuck, making removal difficult.
- Corrosion or Rust: If the bit or chuck is exposed to moisture or corrosive substances, rust can form, binding the bit in place.
- Worn Chuck Components: Over time, the internal components of the chuck, such as jaws or springs, can wear out, reducing their ability to grip and release the bit properly.
- Debris Accumulation: Dust, dirt, or metal shavings can accumulate in the chuck, preventing the bit from moving freely.
- Incorrect Bit Size: Using a bit that’s slightly too large for the chuck can cause it to become stuck during use.
Tools and Materials needed for removal
Before attempting to remove a stuck impact drill bit, gather the following tools and materials:
- Adjustable Wrench or Pliers: These can be used to grip and turn the chuck or bit if necessary.
- Penetrating Oil: Products like WD-40 Specialist Penetrant or PB Blaster can help loosen rusted or corroded components.
- Rubber Mallet or Hammer: A soft-faced mallet can be used to gently tap the chuck or bit without causing damage.
- Heat Source: A heat gun or hairdryer can be used to expand metal components, making them easier to manipulate.
- Screw Extractors: If the bit is severely stuck or broken, a screw extractor set may be necessary.
- Safety Glasses and Gloves: Protect your eyes and hands from flying debris or sharp edges.
Step-by-Step Removal Techniques
Method 1: Manual Rotation and Tapping
- Power Off the Drill: Ensure the drill is turned off and unplugged from any power source to prevent accidental activation.
- Inspect the Chuck: Examine the chuck for any visible debris or damage. Clean it with a brush or compressed air if necessary.
- Apply Penetrating Oil: Spray a generous amount of penetrating oil around the base of the bit where it meets the chuck. Allow it to soak in for at least 15 minutes, or longer if the bit is severely stuck.
- Grip the Chuck: Use an adjustable wrench or pliers to grip the chuck firmly. Ensure you have a good grip to prevent slipping.
- Rotate Counterclockwise: While holding the chuck steady, try to rotate the bit counterclockwise by hand. If it doesn’t move, proceed to the next step.
- Tap Gently: Use a rubber mallet or hammer to gently tap the side of the chuck or the end of the bit. This can help dislodge any rust or debris that’s preventing movement.
- Repeat Rotation and Tapping: Continue alternating between rotating the bit counterclockwise and tapping it gently until it begins to loosen.
Method 2: Using Heat to Expand Metal
- Prepare the Area: Ensure the drill is in a safe, stable position and that you’re wearing safety glasses and gloves.
- Apply Heat: Use a heat gun or hairdryer to apply heat evenly around the chuck and the base of the bit. Heat can cause the metal to expand slightly, making it easier to manipulate.
- Monitor Temperature: Be careful not to overheat the components, as this can damage the drill or cause burns. Keep the heat source moving to prevent localized overheating.
- Attempt Rotation: Once the chuck and bit have heated up, try rotating the bit counterclockwise by hand or with the help of pliers. The expansion may provide enough slack to loosen the bit.
- Cool Down: If the bit doesn’t loosen immediately, allow the components to cool down slightly before reapplying heat and attempting rotation again.
Method 3: Using a Screw Extractor
If the bit is severely stuck or broken off inside the chuck, a screw extractor may be necessary. Here’s how to use one:
- Select the Right Extractor: Choose a screw extractor that’s slightly smaller than the diameter of the bit. Most extractor sets come with multiple sizes to accommodate different fasteners.
- Drill a Pilot Hole: Use a drill bit that’s smaller than the extractor to create a pilot hole in the center of the stuck bit. Be careful not to drill too deep or damage the chuck.
- Insert the Extractor: Place the extractor into the pilot hole and tap it gently with a hammer to ensure it’s seated properly.
- Rotate Counterclockwise: Use an adjustable wrench or pliers to grip the extractor and rotate it counterclockwise. The left-handed threads on the extractor will bite into the bit and help pull it out as you turn.
- Apply Steady Pressure: Continue rotating the extractor with steady pressure until the bit begins to loosen and can be removed by hand.
Brand and Model Considerations
When dealing with a stuck impact drill bit, the brand and model of your drill can influence the removal process. Some drills have chucks that are easier to manipulate or have features designed to prevent bits from becoming stuck. Here are a few popular brands and models to consider:
DeWalt DCD996B 20V MAX XR Cordless Drill
The DeWalt DCD996B is a high-performance cordless drill known for its durability and power. Its three-speed, all-metal high-performance transmission provides optimal speed and torque control for various applications. If a bit becomes stuck in this drill, the following tips may help:
- Use the Chuck Key: Some models of the DCD996B come with a chuck key that can provide additional leverage when rotating the chuck to loosen a stuck bit.
- Check for Debris: The high-performance transmission can generate a lot of debris during use. Ensure the chuck is clean before attempting to remove a stuck bit.
- Apply Heat Carefully: The all-metal construction can withstand heat application, but be careful not to overheat the components, as this can damage the drill’s internal mechanisms.
Milwaukee 2804-20 M18 FUEL Hammer Drill
The Milwaukee 2804-20 is a powerful hammer drill designed for heavy-duty applications. Its POWERSTATE brushless motor and REDLINK PLUS intelligence provide superior performance and durability. If you encounter a stuck bit in this drill, consider the following:
- Utilize the Hammer Function: In some cases, gently activating the hammer function while attempting to rotate the bit counterclockwise can help dislodge it.
- Inspect the Chuck Jaws: The Milwaukee 2804-20 has robust chuck jaws that can grip bits tightly. If a bit becomes stuck, check the jaws for any signs of wear or damage that may be preventing release.
- Use Penetrating Oil Liberally: The high-torque capabilities of this drill can make bits more prone to becoming stuck. Apply penetrating oil generously and allow it to soak in before attempting removal.
Makita XPH12Z 18V LXT Lithium-Ion Brushless Cordless Hammer Drill
The Makita XPH12Z is a versatile and efficient cordless hammer drill known for its compact design and powerful performance. Its brushless motor and extreme protection technology (XPT) make it suitable for use in harsh conditions. If a bit becomes stuck in this drill, try the following:
- Leverage the Compact Design: The compact size of the XPH12Z can make it easier to access tight spaces when attempting to remove a stuck bit. Use an adjustable wrench or pliers with a long handle for additional leverage.
- Check for Moisture: The XPT technology provides enhanced dust and water resistance, but moisture can still accumulate in the chuck over time. Ensure the chuck is dry before attempting to remove a stuck bit.
- Apply Heat Gradually: The brushless motor generates less heat than traditional brushed motors, but the chuck components can still benefit from gradual heat application to help loosen a stuck bit.
Preventing Future Occurrences
To minimize the risk of impact drill bits becoming stuck in the future, follow these preventive measures:
- Use the Correct Bit Size: Always use bits that are the appropriate size for your drill’s chuck. Using bits that are too large or too small can cause them to become stuck or damage the chuck.
- Avoid Over-Tightening: Apply just enough force to secure the bit in the chuck without over-tightening. Over-tightening can cause the bit to become wedged tightly, making removal difficult.
- Keep the Chuck Clean: Regularly clean the chuck with a brush or compressed air to remove dust, dirt, and debris that can accumulate and prevent the bit from moving freely.
- Lubricate Moving Parts: Apply a small amount of lubricant to the chuck’s moving parts, such as the jaws or springs, to keep them operating smoothly and prevent rust or corrosion.
- Store the Drill Properly: When not in use, store the drill in a dry, clean environment to prevent moisture and corrosive substances from damaging the chuck or bit.
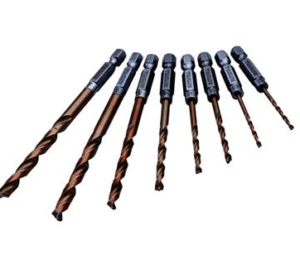
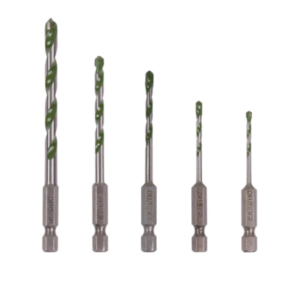
Purchasing Replacement Drill Bits
If you need to replace a stuck or damaged impact drill bit, consider purchasing high-quality bits from reputable brands. You can find a wide selection of drill bits at xiangriyang.com. This website offers a variety of bits designed for different applications and materials, ensuring you can find the perfect fit for your needs. When purchasing replacement bits, consider the following factors:
- Material: Choose bits made from high-speed steel (HSS), cobalt, or carbide for durability and performance.
- Coating: Some bits come with coatings that reduce friction and heat buildup, extending their lifespan and improving cutting efficiency.
- Size and Type: Ensure the bits you purchase are the correct size and type for your drill’s chuck and the materials you’ll be working with.
- Brand Reputation: Opt for bits from well-known brands with a reputation for quality and reliability.
Conclusion
Removing a stuck impact drill bit can be a challenging task, but with the right techniques, tools, and preventive measures, you can minimize the risk of occurrence and resolve the issue efficiently. By understanding why bits become stuck, using the appropriate removal methods, and considering brand and model-specific tips, you can keep your impact drill operating smoothly and avoid frustrating delays on the job site or during DIY projects. Remember to prioritize safety by wearing protective gear and following proper procedures when attempting to remove a stuck bit. With these guidelines in mind, you’ll be well-equipped to handle any stuck bit situation that arises.
