Our Location

304 North Cardinal St.
Dorchester Center, MA 02124

Why does the electric wrench keep flashing and not working?

It sounds like you’re experiencing issues with an electric wrench, such as flashing lights and a lack of functionality. This could be caused by several factors, ranging from simple problems like a low battery or a loose connection to more complex issues involving internal components or electrical faults. Below, I’ll break down the potential causes of the problem, as well as recommendations on how to troubleshoot and resolve it.

Common Causes of Flashing and Non-functioning Electric Wrenches

1. Battery Issues

One of the most common reasons an electric wrench might stop working is due to battery-related problems. If the battery charge is too low or there is an issue with the battery itself, the wrench may start flashing or fail to operate entirely.

  • Battery Charge: Check if the battery is charged properly. Some models have a built-in battery indicator that flashes when the battery is low or needs recharging. If the indicator is flashing, try plugging the wrench into the charger for a few hours.
  • Battery Fault: In some cases, the battery may have deteriorated over time, especially if the wrench is older. Lithium-ion batteries, for example, lose their capacity after several charge cycles. If you notice that the wrench isn’t holding a charge or is charging extremely slowly, it may be time to replace the battery.
  • Battery Connection: The battery may not be properly connected to the tool. Check the battery contacts for corrosion or dirt. Clean them gently with a dry cloth or soft brush. If the contacts seem damaged or the battery no longer fits snugly, replacing the battery may solve the problem.

2. Overheating

Many electric wrenches are designed with thermal protection that shuts off the tool if it overheats. Overheating can occur when the tool is used for extended periods without allowing it to cool down.

  • High Load: If you’ve been using the wrench on a particularly tough job, such as tightening or loosening large bolts, the motor might overheat. If the tool is flashing, give it a break to cool down. Typically, after a few minutes, it should return to normal operation.
  • Improper Usage: Using the wrench for tasks it wasn’t designed for, like attempting to break loose severely rusted or over-torqued fasteners, can cause overheating. Make sure you’re using the right size and type of electric wrench for the task at hand.

3. Faulty Trigger or Switch

The flashing light and failure to operate might also be related to a problem with the trigger or switch. If the trigger mechanism is faulty or malfunctioning, it may not activate the motor, or it may cause erratic behavior.

  • Loose Connections: Over time, the electrical connections inside the trigger assembly may become loose or damaged. This can interrupt the power flow and cause the wrench to flicker or stop working.
  • Switch Failure: The internal switch may be defective, leading to inconsistent power delivery. This could require a more complex repair, such as replacing the switch.

4. Internal Electrical Faults

Another possible issue is a failure in the internal electrical components of the wrench, such as the motor, circuit board, or wiring.

  • Motor Problems: If the motor inside the wrench fails, the tool may emit flashing lights or no longer function. Motor issues are often caused by wear and tear or damage from excessive use.
  • Circuit Board or Fuse: In some cases, the internal circuit board or fuse could be damaged, causing electrical interruptions. A faulty circuit board can prevent the tool from functioning correctly. This is a more serious issue that may require professional repair or replacement of the electrical components.

5. Clutch or Mechanism Issues

Electric wrenches often feature a built-in clutch to protect the internal components and prevent over-tightening. If the clutch fails or the internal mechanisms are blocked or misaligned, the tool may stop working.

  • Clutch Malfunction: If the clutch isn’t engaging or disengaging properly, the wrench may start flashing or not function at all. This could be due to dirt, corrosion, or wear on the clutch parts.
  • Mechanism Jams: Check if the mechanism is jammed or if there’s an obstruction inside the wrench. Small debris or foreign objects can sometimes prevent the wrench from operating correctly.

Troubleshooting Steps

To fix the issue of an electric wrench flashing and not working, follow these troubleshooting steps:

  1. Check the Battery: Ensure the battery is charged. If the battery isn’t holding a charge or is showing signs of wear, consider replacing it.
  2. Allow the Tool to Cool: If you suspect overheating, let the tool cool for 10-15 minutes before attempting to use it again.
  3. Inspect the Trigger and Switch: Look for signs of damage to the trigger or switch. If you see anything unusual, clean or replace the switch.
  4. Look for Visible Damage: Inspect the wrench for any obvious damage, especially in the internal mechanisms. A damaged motor or circuit board may require professional repair.
  5. Contact Customer Support: If none of the above solutions work, refer to the user manual for your specific model and contact the manufacturer’s customer support for further assistance.

Brands and Models of Electric Wrenches

Electric wrenches come in a variety of brands and models, each with different features and capabilities. Here are some popular brands and models of electric wrenches that you can consider:

1. DeWalt DCF899P1

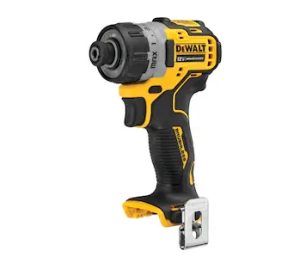
DeWalt is known for its high-quality power tools, and the DCF899P1 is no exception. This 20V max lithium-ion impact wrench features a high torque output of up to 700 ft-lbs, making it ideal for heavy-duty applications. If the wrench starts flashing, it’s often due to an overheating issue or a battery that needs recharging.

2. Milwaukee M18 Fuel 2767-20

Milwaukee’s M18 Fuel 2767-20 is a cordless impact wrench with a brushless motor that provides maximum torque of 1,000 ft-lbs. It features a compact design and advanced electronic controls to prevent overheating and excessive current draw. Flashing lights may indicate an issue with the battery or overuse.

3. Makita XWT11Z

Makita’s XWT11Z is a 3/8-inch cordless impact wrench that is lightweight and easy to handle. It delivers 155 ft-lbs of torque and operates at variable speeds. If the wrench is flashing, it’s most likely due to a problem with the battery or a malfunctioning trigger.

4. Bosch GDX18V-1800CB15

The Bosch GDX18V-1800CB15 is an impact driver/wrench combo tool that provides versatility for various applications. With a maximum torque of 1,800 in-lbs, it’s perfect for both professional and DIY tasks. Flashing lights may indicate the need for a battery replacement or an issue with the switch.

5. Snap-on CT8850

Snap-on is known for manufacturing high-end automotive repair tools, and the CT8850 is no exception. This 3/8-inch cordless impact wrench delivers up to 450 ft-lbs of torque. Flashing lights may indicate overheating, low battery, or a malfunctioning electrical component.

6. Ryobi P261

Ryobi’s P261 is a budget-friendly electric wrench that offers good performance at a reasonable price. It features a 3/8-inch square drive and delivers up to 300 ft-lbs of torque. A flashing light on this model may be an indicator of a low battery or overheating.

7. Craftsman C3 19.2V Impact Wrench

Craftsman’s C3 19.2V Impact Wrench is designed for DIY enthusiasts. It provides 225 ft-lbs of torque and features a 3/8-inch drive. Flashing lights typically indicate a low battery or a malfunctioning internal component.

Conclusion

If your electric wrench is flashing and not working, the problem could be related to the battery, overheating, a faulty switch, or internal electrical issues. To fix the problem, check the battery, give the tool time to cool down, inspect the trigger and switch, and ensure there are no obstructions. If these steps don’t resolve the issue, it may be time to contact customer support or have the tool professionally repaired.

Additionally, many electric wrenches come from reputable brands like DeWalt, Milwaukee, Makita, Bosch, Snap-on, Ryobi, and Craftsman. Knowing the model and understanding the possible causes of issues in your specific tool can help you troubleshoot more effectively and keep your wrench in good working condition.


4o
您说:
接着上面继续写
ChatGPT 说:
ChatGPT

Extended Troubleshooting: Detailed Solutions for Specific Issues

When an electric wrench displays flashing lights or refuses to function properly, it’s important to go beyond basic troubleshooting and address the potential specific issue in more depth. Here are additional, more specific solutions to common problems associated with these tools.

1. Battery Charger Problems

Often, the issue lies not with the battery itself but with the charger. If the electric wrench is flashing and not charging properly, the charger could be faulty or malfunctioning. A few things to consider:

  • Charger Malfunction: If your battery isn’t charging when placed on the charger, the charger could be defective. Inspect the charging port for any debris, dirt, or corrosion. Clean the port with a soft cloth. Also, check the power supply to ensure the charger is plugged in properly and has power. Sometimes, power strips or extension cords can cause electrical issues, so plugging the charger directly into the wall socket can rule out this possibility.
  • Charger Indicator: Some chargers have an indicator light that shows the status of the charging process. If this light is flashing or not lighting up at all, it could signal a problem with either the charger or the battery. If the indicator light shows red or blinking, this could indicate the charger is overheating or there is an issue with the charging cycle.
  • Incompatible Charger: Ensure that you are using the correct charger for your wrench’s battery type and voltage. Using an incompatible charger can cause improper charging or no charging at all. Always double-check the manufacturer’s recommendations for charging compatibility.

2. Motor Issues: Repair or Replace?

If the motor inside the wrench starts malfunctioning, the flashing light may indicate that the tool is not receiving enough current to operate. Common motor issues could include:

  • Brush Wear (For Brushed Motors): Many older models of electric wrenches use brushed motors, and these brushes wear down over time. If your wrench uses this kind of motor, check if the brushes are still intact. Worn brushes can lead to poor motor performance or complete failure to operate. If you feel comfortable with repairs, you can replace the motor brushes yourself. If not, take the tool to a service center.
  • Brushless Motors: If your tool uses a brushless motor (common in newer, more expensive models like the DeWalt DCF899P1 or Milwaukee M18 Fuel), the issue may not lie in the brushes but could be related to the electronic components. A flashing light on a brushless motor may indicate that the tool is drawing too much power due to a malfunction, which could require a professional diagnostic.
  • Overvoltage/Undervoltage: Electric wrenches are designed to operate within a specific voltage range. If the motor receives too much voltage (overvoltage) or too little (undervoltage), it can fail to function, and the flashing lights could indicate a voltage problem. Overvoltage can occur if the wrong battery is inserted or if there’s an issue with the tool’s internal voltage regulator.
  • Internal Wiring Fault: Sometimes, the issue lies within the internal wiring of the wrench. A short circuit, broken wire, or loose connection can prevent the motor from receiving power. Diagnosing this requires opening the casing of the wrench (if you’re comfortable doing so) and inspecting the wiring for visible damage. If you find damaged wires or connections, the tool may need professional repair or replacement of certain components.

3. Electronic Control Module (ECM) Problems

Modern electric wrenches often feature electronic control modules that manage various features such as torque settings, power regulation, and battery management. If these modules malfunction, the tool might fail to work properly, causing flashing lights or erratic behavior.

  • Faulty ECM or Circuit Board: If your wrench uses an electronic control module (like the Milwaukee M18 Fuel series or Bosch GDX18V-1800CB15), this could be the source of the problem. The ECM manages everything from battery charging to speed control. If the circuit board gets damaged (due to moisture, heat, or a power surge), it may cause the wrench to stop functioning or display flashing lights. Unfortunately, fixing or replacing an ECM typically requires specialized knowledge and equipment, so seeking professional service is recommended.
  • Resetting the Tool: Some electric wrenches have a reset function. This can often be done by turning the tool off and on several times or by pressing a reset button (if available). Check your user manual for any specific reset procedures for your model. If the tool’s electronics are misbehaving, this may help restore normal function.

4. Tool Overload and Torque Settings

If the wrench is operating but flashes intermittently or does not seem to work as expected, the issue could lie with the overload protection settings or torque limits. Many electric wrenches are equipped with an overload protection feature that prevents them from damaging internal components.

  • Torque Setting: Ensure that the torque setting is correctly adjusted for the task. Using too high of a torque setting for lighter jobs could result in the tool’s internal protection circuit kicking in, causing it to stop working temporarily and flash to indicate overload.
  • Overload Protection: The overload protection mechanism is designed to prevent damage when the wrench is under too much load, which can be common when working with large fasteners or hard materials. Allow the tool to cool down and try using it with a lower torque setting or for a shorter duration.

5. Cleaning and Maintenance

Regular cleaning and maintenance can extend the lifespan of your electric wrench and prevent common problems such as flashing lights. Over time, dirt, dust, and other debris can accumulate in the tool’s motor and moving parts, leading to operational issues.

  • Cleaning the Motor Ventilation: Electric wrenches often have small ventilation openings to cool down the motor. If these become clogged with dirt or debris, the motor can overheat and trigger flashing lights. Use compressed air or a soft brush to clear out any buildup in the ventilation areas.
  • Lubrication: If your electric wrench features moving internal parts (such as a mechanical clutch or gear mechanism), make sure they are properly lubricated. Lack of lubrication can cause these parts to wear out or seize up, resulting in the tool malfunctioning.
  • General Maintenance: Following the manufacturer’s recommendations for regular maintenance can prevent many of these issues. This might include checking the tool for loose screws, inspecting the battery contacts, and ensuring that the chuck or drive mechanism is clean and free from obstructions.

Preventive Measures

To avoid future issues with your electric wrench and prevent the flashing lights from happening again, consider implementing the following preventive measures:

  • Avoid Overuse: Give the tool breaks to cool down, especially during heavy-duty use. Extended periods of constant use can overheat the motor and trigger internal safety mechanisms.
  • Proper Storage: Store the wrench in a cool, dry place when not in use. Extreme temperatures, especially heat, can affect the performance of both the battery and the internal components.
  • Regular Inspections: Periodically check the tool for wear and tear. This includes inspecting the battery, motor, wiring, and connections. Catching small issues early can help prevent more serious problems down the road.
  • Battery Care: When storing the electric wrench for long periods, make sure the battery is removed, as leaving a battery in the tool can lead to long-term degradation. Also, try to store the battery at around 50% charge to prevent over-discharge.
  • Use the Right Tool for the Job: Always ensure you’re using the correct torque and settings for the material you’re working with. Using excessive force or torque on softer materials can strain the tool and lead to overheating or mechanical damage.

Advanced Diagnostic Steps for Electric Wrench Issues

In some cases, a more in-depth examination of the internal components of your electric wrench may be required, particularly if common troubleshooting steps like checking the battery or cleaning the contacts do not resolve the flashing lights or non-functioning issues. Below are some advanced diagnostic steps you can follow for deeper troubleshooting:

1. Disassembling the Tool for Internal Inspection

If you’re comfortable with tool maintenance, you can disassemble your electric wrench to inspect its internal components. This step may be necessary if you suspect issues like a faulty motor, damaged wiring, or an internal switch malfunction. Always ensure that the tool is turned off and the battery is removed before you begin disassembling.

  • Removing the Outer Casing: Carefully unscrew and remove the outer casing of the electric wrench. Make sure you keep track of all the screws and parts as you disassemble the tool. Use a small container or tray to organize these parts to avoid losing them.
  • Inspecting the Motor: Check the motor for any signs of damage or wear, such as burnt or scorched areas, or if it feels unusually hot to the touch. Look for any dust or debris inside the motor housing, as these can impede performance and cause overheating. You can gently clean the motor and parts around it using compressed air or a soft brush.
  • Examining the Wiring and Connections: Carefully inspect all wiring inside the tool for any visible damage or loose connections. A broken wire or loose solder joint could be the root cause of the flashing light. Look for signs of fraying or wear on the wires, and check for any exposed or short-circuiting areas. If you find any issues, you may need to re-solder wires, replace damaged sections, or secure loose connections.
  • Inspecting the Internal Circuit Board: In more complex models, such as those with brushless motors or electronic control systems, a malfunctioning internal circuit board could be causing the flashing lights. Inspect the circuit board for any visible signs of damage, such as burnt components, corrosion, or loose connections. If you suspect a faulty board, it might need to be replaced, as repair could be complicated and require specialized knowledge.

2. Testing the Motor with a Multimeter

A multimeter is an invaluable tool for diagnosing electrical issues in your electric wrench. If you suspect a problem with the motor or circuit board, using a multimeter to measure voltage, current, and resistance can help pinpoint the problem.

  • Testing Continuity: Set your multimeter to the continuity setting and check the wiring and connections for continuity. This test will help you determine if there are any broken wires or disconnected parts inside the wrench. For a complete check, measure the continuity of the motor windings as well, which can reveal internal shorts or breaks.
  • Measuring Voltage and Current: If the motor and internal wiring appear intact, you can measure the voltage and current being supplied to the motor when you activate the tool. Set your multimeter to measure DC voltage and place the probes on the motor’s terminals. Compare the readings to the specifications in the user manual to determine whether the motor is receiving the correct power. Similarly, check for any unusual fluctuations in current that may point to an internal issue.
  • Testing the Brushes (for Brushed Motors): If your electric wrench uses a brushed motor, you can check the condition of the brushes. Set the multimeter to check for continuity between the brush and the motor housing. If you find that the brushes are not making proper contact, they may need to be replaced. Worn brushes are a common cause of poor performance in brushed motors.

3. Examining the Clutch and Gear Mechanism

Electric wrenches often feature an internal clutch mechanism to protect the tool from excessive strain. If the clutch fails to engage or disengage properly, the tool may fail to function correctly.

  • Check the Clutch Mechanism: Inspect the clutch mechanism to ensure that it is not jammed or blocked by dirt or debris. You may need to remove the outer casing and the gear cover to access the clutch. If the clutch is slipping or damaged, it could be causing the flashing lights or failure to work. In some cases, you may need to replace the clutch mechanism.
  • Lubricating Gears and Clutch: If the gears inside the tool appear to be grinding or moving roughly, it may be a sign of insufficient lubrication. Apply the appropriate lubricant to the gears and clutch parts. Over time, lubrication can break down, causing internal components to wear out faster. Ensure that you use the type of lubricant recommended by the manufacturer to avoid damaging the components.
  • Testing the Torque Control Mechanism: If your wrench has an adjustable torque setting, ensure that it is not set too high for the task at hand. A malfunctioning torque control system could cause the wrench to overheat or stop functioning, triggering flashing lights. Test the tool with different torque settings to see if this changes the behavior.

4. Verifying the Circuit Board’s Functionality

As electric wrenches become more sophisticated, the reliance on electronic components, such as circuit boards and sensors, has increased. These parts can malfunction, causing a wide range of issues, including flashing lights, lack of power, or inconsistent behavior.

  • Visual Inspection: Begin by visually inspecting the circuit board for signs of overheating, burnt components, or corrosion. A damaged component could be causing the flashing lights, as it may disrupt the flow of power to critical parts of the tool.
  • Checking the Sensors: Many modern electric wrenches use torque sensors or temperature sensors to regulate the motor’s performance. If one of these sensors fails or malfunctions, the tool might trigger the flashing lights as a warning. To test the sensors, you may need to refer to the tool’s service manual or seek professional help to diagnose the specific issue.
  • Replacing the Circuit Board: If the circuit board is defective and the tool is still under warranty, you may be able to get a replacement directly from the manufacturer. If the warranty has expired, it’s usually more cost-effective to consult with a repair center, as replacing a circuit board on your own may be technically challenging and could void the warranty if done improperly.

Professional Repair Services

If after performing these advanced diagnostic steps, the problem still persists or you are not comfortable performing these repairs yourself, it’s highly recommended that you take your tool to a certified repair center. These centers have the tools and expertise to properly diagnose and fix issues that are not immediately apparent.

When looking for professional repair services, consider the following:

  • Warranty Coverage: Check if your electric wrench is still under warranty. Many manufacturers offer repair services for free or at a reduced cost if the tool is still covered. Make sure to have the tool’s serial number and purchase receipt ready when contacting the manufacturer’s customer service.
  • Certified Repair Centers: Choose a repair center that is authorized by the manufacturer. Authorized centers will use genuine parts and ensure the repairs maintain the tool’s integrity.
  • Repair Costs: Ask for an estimate before proceeding with any repairs. In some cases, the cost of repairs, particularly for major internal component replacements like the motor or circuit board, may exceed the price of a new tool. Weigh the cost of repair versus replacement before making a decision.

Conclusion

In conclusion, troubleshooting an electric wrench that is flashing and not working can involve a range of solutions, from simple battery checks to more advanced diagnostics of internal components like the motor, circuit board, and clutch. By following a step-by-step approach and using tools like a multimeter, you can narrow down the issue and either fix it yourself or seek professional help.

If the tool is under warranty, always contact the manufacturer first, as they may provide free repair or replacement options. Regular maintenance, such as keeping the motor clean, checking for wiring issues, and ensuring proper lubrication, will also help prevent future problems.

With tools from reputable brands like DeWalt, Milwaukee, Makita, Bosch, and others, a little maintenance and care can ensure that your electric wrench continues to function reliably for many years.

Share your love

Leave a Reply