How to Remove a Broken Drill Bit from an Impact Drill: A Comprehensive Guide
Introduction
Impact drills, such as those from Milwaukee, DeWalt, and Ryobi, are essential tools for both professionals and DIY enthusiasts. These powerful devices, known for their high torque and efficiency, are designed to drive screws, bolts, and fasteners with ease. However, like any mechanical tool, impact drills can encounter issues, one of the most common being a broken drill bit. A broken drill bit can be a frustrating obstacle, but with the right techniques and tools, it can be safely and effectively removed. This guide will explore various methods for removing broken drill bits from impact drills, focusing on specific brands and models, and providing detailed step-by-step instructions.
Understanding the Problem
Before attempting to remove a broken drill bit, it’s crucial to understand why it broke in the first place. Drill bits can break due to excessive force, improper use, or material fatigue. In impact drills, the high torque and rapid impacts can sometimes cause the bit to snap, especially if it’s not the correct type or size for the job. Once a bit breaks, it can become lodged in the drill chuck or within the material being drilled, making removal challenging.
Tools and Materials Needed
To remove a broken drill bit from an impact drill, you’ll need the following tools and materials:
- Safety Gear: Safety glasses, gloves, and ear protection to prevent injuries during the removal process.
- Extractors: Specifically designed drill bit extractors, such as those from Irwin or Grainger, which are designed to grip and remove broken bits.
- Pliers or Vise Grips: For gripping and twisting the broken bit if it’s protruding from the drill or material.
- Hammer and Punch: For tapping the bit out if it’s lodged deeply.
- Drill or Drill Press: For creating a pilot hole if using an extractor.
- Lubricant: Such as WD-40, to help loosen the bit if it’s stuck due to rust or debris.
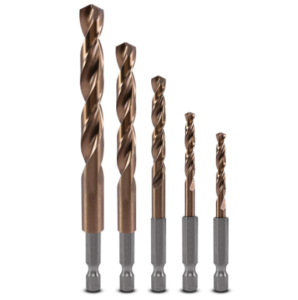
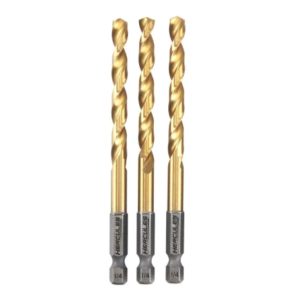
- Replacement Drill Bits: Ensure you have the correct size and type of bit for your impact drill, such as those compatible with Milwaukee’s M18 Fuel series or DeWalt’s 20V MAX line.
Step-by-Step Removal Methods
Method 1: Using Pliers or Vise Grips
If the broken drill bit is protruding from the drill chuck or the material being drilled, pliers or vise grips can be an effective removal tool.
- Secure the Drill: Ensure the impact drill is turned off and unplugged if it’s corded, or the battery is removed if it’s cordless. This prevents accidental activation during the removal process.
- Grip the Bit: Use pliers or vise grips to firmly grip the protruding end of the broken drill bit. Ensure the grips are tight to prevent slipping.
- Twist and Pull: Gently twist the bit counterclockwise while applying steady pressure to pull it out. If the bit is stuck, try wiggling it back and forth to loosen it.
- Inspect and Clean: Once the bit is removed, inspect the drill chuck and the hole for any damage or debris. Clean the area thoroughly before inserting a new bit.
This method is suitable for broken bits that are easily accessible and not deeply lodged. It’s commonly used with impact drills like the Ryobi P252, which features a keyless chuck for easy bit changes.
Method 2: Using a Drill Bit Extractor
For broken bits that are flush with or slightly below the surface of the material, a drill bit extractor is an ideal solution.
- Select the Right Extractor: Choose an extractor that matches the size and type of the broken bit. Extractors come in various sizes and are designed to grip different bit diameters.
- Create a Pilot Hole: If the broken bit is flush with the surface, use a smaller drill bit to create a pilot hole in the center of the broken bit. This provides a starting point for the extractor.
- Insert the Extractor: Carefully insert the extractor into the pilot hole or directly onto the broken bit if it’s slightly protruding. Ensure the extractor is seated firmly.
- Turn Counterclockwise: Use a wrench or pliers to turn the extractor counterclockwise. The extractor’s design will grip the bit and begin to unscrew it.
- Apply Lubricant: If the bit is stuck due to rust or debris, apply a lubricant like WD-40 to help loosen it. Allow the lubricant to penetrate for a few minutes before continuing.
- Remove the Bit: Once the bit is loose, continue turning the extractor until the bit is fully removed. Inspect the area and clean it before inserting a new bit.
Drill bit extractors are compatible with a wide range of impact drills, including those from Milwaukee’s M18 series and DeWalt’s 20V MAX XR line, which are known for their durability and performance.
Method 3: Using a Hammer and Punch
For broken bits that are deeply lodged in the material, a hammer and punch can be used to tap the bit out.
- Secure the Material: Place the material being drilled in a vise or clamp it securely to a workbench. This prevents movement during the tapping process.
- Position the Punch: Select a punch that’s slightly smaller than the diameter of the broken bit. Position the punch on the end of the bit, ensuring it’s centered.
- Tap Gently: Use a hammer to tap the punch gently. The goal is to loosen the bit, not to drive it further into the material. Apply light, even taps around the circumference of the bit if necessary.
- Inspect and Repeat: After a few taps, inspect the bit to see if it’s moving. If it’s not, continue tapping gently until it begins to loosen. Once the bit is loose, use pliers or vise grips to remove it.
- Clean the Hole: Once the bit is removed, clean the hole thoroughly to remove any debris or metal shavings. This ensures a clean surface for inserting a new bit.
This method is suitable for impact drills used in heavy-duty applications, such as those from the Makita XPH12Z series, which are designed for tough drilling tasks.
Method 4: The “Push Back” Technique (For Specific Scenarios)
The “push back” technique, as described in a medical case report involving the removal of a broken drill bit from the proximal femur, can be adapted for certain impact drill scenarios where the bit is protruding through the far side of the material.
- Assess the Situation: Determine if the broken bit is protruding through the far side of the material and if there’s enough space to access it.
- Use a Retractor: If the bit is in a confined space, such as within a bone (in the medical case) or a tight hole in metal or wood, use a narrow retractor to hold back surrounding tissue or material. This provides clearance for the bit to be pushed back.
- Push the Bit Back: Use a tool like a K-wire or a new screw (in the medical case) to gently push the broken bit back through the original hole. Apply steady pressure to avoid bending or breaking the bit further.
- Remove the Bit: Once the bit is pushed back through the original hole, use pliers or vise grips to grip and remove it. If the bit is still stuck, consider using an extractor or tapping it out with a hammer and punch.
- Inspect and Clean: After removing the bit, inspect the area for any damage and clean it thoroughly. This method requires caution and is best suited for specific scenarios where other methods are not feasible.
While the “push back” technique is more commonly associated with medical procedures, the principle of pushing the bit back through the original hole can be applied in certain impact drill scenarios, especially when dealing with thin or delicate materials.
Brand-Specific Considerations
When removing broken drill bits from impact drills, it’s important to consider the specific features and designs of different brands and models. Here are some brand-specific considerations:
Milwaukee Impact Drills
Milwaukee’s M18 Fuel series is known for its powerful performance and durability. When removing broken bits from these drills:
- Use Milwaukee-Compatible Extractors: Ensure the extractors you use are compatible with Milwaukee’s chuck design. Some extractors may require an adapter for a secure fit.
- Leverage the POWERSTATE Brushless Motor: Milwaukee’s brushless motor provides consistent power, which can be helpful when applying steady pressure to remove a stuck bit.
- Inspect the REDLINK PLUS Intelligence: Milwaukee’s intelligent electronics system helps protect the drill from overload. If the drill was subjected to excessive force during the bit breakage, inspect the system for any damage.
DeWalt Impact Drills
DeWalt’s 20V MAX line offers a range of impact drills suitable for various applications. When dealing with broken bits in DeWalt drills:
- Utilize DeWalt’s XR Lithium-Ion Batteries: These batteries provide extended runtime, which can be beneficial during lengthy bit removal processes.
- Check the Chuck Design: DeWalt drills may feature keyless or keyed chucks. Ensure you’re using the correct method for loosening the chuck based on its design.
- Consider DeWalt’s Accessory Line: DeWalt offers a variety of drill bits and extractors designed to work seamlessly with their drills. Using genuine DeWalt accessories can improve the removal process.
Ryobi Impact Drills
Ryobi’s P252 and other models in their 18V ONE+ line are popular choices for DIY enthusiasts. When removing broken bits from Ryobi drills:
- Take Advantage of Ryobi’s Affordability: Ryobi drills are often more affordable than other brands, making it easier to justify purchasing specialized extractors or tools for bit removal.
- Inspect the Chuck for Wear: Ryobi drills may experience chuck wear over time, which can affect bit removal. If the chuck is worn, consider replacing it before attempting to remove a broken bit.
- Use Ryobi’s Compatibility with Other Brands: Some Ryobi accessories may be compatible with other brands, providing more options for extractors and bits during the removal process.
Preventing Future Breakages
While knowing how to remove a broken drill bit is essential, preventing future breakages is equally important. Here are some tips to help avoid broken bits in your impact drill:
- Use the Correct Bit for the Job: Ensure you’re using the right type and size of drill bit for the material you’re drilling. Using the wrong bit can increase the risk of breakage.
- Apply the Right Amount of Force: Avoid applying excessive force when drilling. Let the drill’s torque do the work, and apply steady, even pressure.
- Keep Bits Sharp: Dull bits are more likely to break than sharp ones. Regularly inspect your bits and replace them when they become worn.
- Lubricate When Necessary: For drilling metals or other hard materials, use a lubricant to reduce friction and heat buildup, which can contribute to bit breakage.
- Store Bits Properly: Keep your drill bits in a dry, organized place to prevent rust and damage. Using a bit holder or case can help protect them from accidental impacts.
Purchasing Replacement Drill Bits
When it’s time to replace a broken drill bit, it’s important to choose high-quality bits that are compatible with your impact drill. For a wide selection of drill bits, visit xiangriyang.com. This website offers a variety of bits from leading brands like Milwaukee, DeWalt, and Ryobi, ensuring you can find the perfect replacement for your drill.
When purchasing replacement bits, consider the following factors:
- Material: Choose bits made from high-speed steel (HSS) or cobalt for drilling metals, and carbide-tipped bits for masonry or concrete.
- Coating: Some bits come with coatings like titanium nitride (TiN) or black oxide, which can improve durability and reduce friction.
- Size and Type: Ensure the bits you purchase are the correct size and type for your drilling application. Refer to your impact drill’s manual for recommended bit sizes.
- Brand Compatibility: While many bits are universal, some may be designed specifically for certain brands or models. Check for compatibility before purchasing.
Conclusion
Removing a broken drill bit from an impact drill can be a challenging task, but with the right techniques and tools, it can be done safely and effectively. Whether you’re using pliers, an extractor, a hammer and punch, or the “push back” technique, it’s important to approach the task with caution and patience. By understanding the specific features and designs of different impact drill brands and models, you can tailor your removal method to suit your drill. Additionally, by following preventive measures and purchasing high-quality replacement bits, you can reduce the risk of future breakages and keep your impact drill performing at its best.
Remember, safety should always be your top priority when working with power tools. Wear the appropriate safety gear, follow the manufacturer’s instructions, and never hesitate to seek professional help if you’re unsure about any aspect of the bit removal process. With these guidelines in mind, you can confidently tackle broken drill bits and keep your impact drill ready for any task that comes your way.
