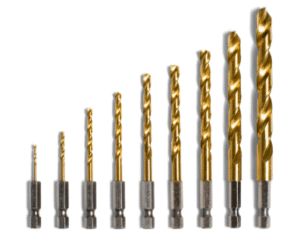
Impact drills are indispensable tools for both DIY enthusiasts and professional tradespeople, used to drill through materials like wood, metal, concrete, and masonry. However, a common and frustrating issue users face is a stuck drill bit—a problem that can halt projects, damage the drill or bit, and even pose safety risks if not addressed correctly. A stuck bit typically occurs due to factors like 夹头磨损 (chuck wear), overheating, debris accumulation, incorrect installation, or mismatched bit and material hardness. Resolving this issue requires a systematic approach, tailored to both the cause of the stuck bit and the specific design of your impact drill (including its brand and model).
This guide will walk you through every aspect of removing a stuck impact drill bit, from identifying the root cause to executing safe, effective removal methods. We’ll also dive into brand-specific considerations for top manufacturers like Bosch, DeWalt, Makita, Milwaukee, and Black+Decker, highlighting how their unique chuck designs, motor types, and build quality influence the removal process. Additionally, we’ll cover preventive measures to avoid future bit sticking and troubleshooting for common complications (e.g., broken bits, damaged chucks). By the end of this guide, you’ll have the knowledge to resolve stuck bits confidently, protect your tools, and minimize project downtime.
Before attempting to remove a stuck drill bit, it’s critical to understand why it’s stuck. Different causes require different solutions, and misdiagnosing the issue can lead to further damage (e.g., bending the bit, breaking the chuck). Below are the most frequent reasons for a stuck impact drill bit, with detailed explanations and real-world examples tied to popular drill models.
The chuck is the component that holds the drill bit in place, typically featuring three or four metal “jaws” (or claws) that tighten around the bit’s shank. Over time, these jaws can wear down, become misaligned, or lose their tension—preventing them from either clamping the bit securely or releasing it when needed. This is especially common in drills used frequently for heavy-duty tasks (e.g., concrete drilling) or drills with plastic chuck housings (more prone to cracking).
- Example with Bosch GSB 550: The Bosch GSB 550 is a popular 550W corded impact drill with an automatic-locking three-jaw chuck (a common design for mid-range drills). After 2–3 years of regular use (e.g., drilling into concrete for home renovations), the chuck’s jaws may develop micro-abrasions from constant friction with drill bits. These abrasions reduce the jaws’ grip, causing the bit to shift during drilling—eventually leading to a stuck bit when the jaws can no longer release.
- Example with Black+Decker BDD716C2: This 18V cordless drill (targeted at DIY users) has a lightweight plastic chuck housing. If the chuck is overtightened repeatedly (e.g., by forcing the jaws to clamp a bit too hard), the plastic housing can crack, misaligning the jaws. A misaligned chuck will not release the bit evenly, resulting in a stuck bit that feels “jammed” even when the chuck is supposed to loosen.
Drilling generates friction, which produces heat—especially when working with dense materials like metal or concrete. If the drill bit or chuck overheats, two issues can cause sticking:
- Thermal Expansion: The drill bit’s shank (the part held by the chuck) expands when heated, creating a tighter fit inside the chuck. When cooled, the shank may contract slightly, but if the heat was intense enough, the metal can “set” into the chuck, making removal difficult.
- Metal Galling: For metal-on-metal contact (e.g., a steel drill bit in a steel chuck), extreme heat can cause the metals to fuse slightly (a process called “galling”). This creates a bond between the bit and chuck that resists loosening.
- Example with DeWalt DCD791D2: This 18V brushless cordless drill is powerful enough to drill through thick steel (e.g., ½-inch galvanized pipe). If used to drill steel without a cooling agent (e.g., cutting oil or water), the bit’s shank can reach temperatures exceeding 300°F (150°C). The DeWalt DCD791D2’s chuck is made of hardened steel, which can gall with the heated bit shank. A user may finish drilling, turn off the drill, and find the bit completely stuck—even when the chuck’s release mechanism is activated.
- Example with Makita HP1641: A 710W corded impact drill designed for concrete drilling, the Makita HP1641 uses carbide-tipped bits (which are more heat-resistant than high-speed steel). However, if the drill is run continuously for 5+ minutes (e.g., drilling a 16mm hole in reinforced concrete), the chuck can still overheat. The heat transfers to the bit’s shank, causing expansion. When the drill cools, the shank contracts but remains wedged in the chuck due to the tight initial fit.
Debris—such as wood shavings, metal filings, or concrete dust—can accumulate in the small gaps between the chuck’s jaws or between the chuck and the drill’s motor housing. Over time, this debris hardens (especially concrete dust, which absorbs moisture and sets like a thin layer of cement) or clogs the chuck’s moving parts, preventing the jaws from opening or closing properly.
- Example with Makita DHP481Z: This 18V cordless impact drill is often used for woodworking (e.g., building furniture). When drilling pine or oak, fine wood shavings can get trapped in the chuck’s jaw gaps. If the drill is not cleaned after use, these shavings can build up, acting like a wedge between the jaws. A user may insert a new bit, drill for a few minutes, and find the bit stuck because the shavings prevent the jaws from releasing.
- Example with Milwaukee 2804-20: A heavy-duty 18V brushless drill used for construction, the Milwaukee 2804-20 is frequently used to drill concrete. Concrete dust is highly abrasive and fine, making it easy to enter the chuck’s internal mechanism. If the drill is used on a dusty job site without a dust collection attachment, the dust can accumulate inside the chuck, hardening over time. This hardening blocks the chuck’s gears from turning, so when the user tries to release the bit, the chuck remains locked.
Even a high-quality drill can experience a stuck bit if the bit is installed incorrectly. Common installation mistakes include:
-
Not Inserting the Bit Fully: The bit’s shank must be inserted all the way into the chuck (until it hits the bottom) to ensure even clamping. If only part of the shank is inserted, the jaws will clamp unevenly, causing the bit to shift during drilling and get stuck.
-
Misaligning the Bit: If the bit is not centered in the chuck (e.g., inserted at an angle), the jaws will clamp it crookedly. This uneven pressure can cause the bit to jam in the chuck when drilling, as the shank is forced against one side of the jaws.
-
Overtightening the Chuck: While the chuck needs to be tight enough to hold the bit securely, overtightening (e.g., using pliers to twist the chuck 外套) can damage the jaws or housing, preventing them from releasing later.
-
Example with Black+Decker HD18PD: This 18V cordless drill has a manual-locking chuck (users twist the outer sleeve to tighten/loosen). A DIY user may rush to install a bit, inserting it only halfway into the chuck before twisting the sleeve tight. When drilling into a 2×4, the bit shifts inside the chuck, causing the shank to get wedged against the jaws. The user then tries to loosen the chuck but finds it stuck—because the uneven pressure has deformed the jaws slightly.
-
Example with Bosch GSB 13 RE: A 600W corded drill with a manual chuck, the Bosch GSB 13 RE is often used by beginners. A new user may insert a bit at an angle, then tighten the chuck as hard as possible. When drilling into metal, the bit wobbles, and the shank rubs against the jaws, creating friction and heat. By the time the user stops drilling, the bit is stuck because the misaligned shank has “settled” into the chuck.
Using the wrong type of drill bit for the material being drilled is a common cause of sticking. Drill bits are designed for specific materials (e.g., high-speed steel for wood/metal, carbide for concrete), and using a bit that is too soft for the material can lead to:
-
Bit Deformation: A soft bit (e.g., high-speed steel) drilling into a hard material (e.g., stainless steel) will bend or flatten at the shank, causing it to get stuck in the chuck.
-
Bit Breakage: If the bit breaks mid-drilling, the broken shank may remain lodged in the chuck, as the jaws are still clamped around it.
-
Example with Milwaukee 2604-20: This 12V cordless drill is compact and ideal for light tasks (e.g., drilling drywall or wood). A user may mistakenly use a high-speed steel (HSS) bit (designed for wood) to drill into stainless steel. The HSS bit is too soft for stainless steel, so the shank bends slightly as the drill applies pressure. The bent shank then gets stuck in the chuck, as it no longer fits the round opening of the jaws.
-
Example with DeWalt DW511: A 800W corded impact drill for heavy-duty concrete work, the DeWalt DW511 requires carbide-tipped bits. If a user uses a masonry bit (designed for brick, not reinforced concrete) to drill into a concrete wall with rebar, the bit’s tip may break off. The remaining shank stays in the chuck, and the user may not realize the bit is broken until they try to remove it—finding the shank stuck because the jaws are still clamped tight.
Safety must be the top priority when attempting to remove a stuck drill bit. Impact drills (especially corded models) carry electrical risks, and tools used for removal (e.g., wrenches, heat guns) can cause injury if misused. Below are critical safety steps to follow before starting the removal process, along with explanations of why each step is necessary.
Never attempt to remove a stuck bit while the drill is connected to power (corded) or has a battery inserted (cordless). Even if the drill is turned off, a accidental press of the trigger can cause the chuck or bit to spin, leading to hand injuries or tool damage.
- For Corded Drills (e.g., Bosch GSB 550, DeWalt DW511): Unplug the power cord from the wall outlet or extension cord. Inspect the cord for damage (e.g., frayed wires) before handling—if the cord is damaged, avoid touching it and use a different tool for removal.
- For Cordless Drills (e.g., DeWalt DCD791D2, Makita DHP481Z): Remove the battery pack from the drill. Most cordless drills have a release button on the side of the battery compartment—press this button and slide the battery out. Set the battery aside in a cool, dry place (away from flammable materials).
The removal process may involve tools that can cause flying debris, sharp edges, or heat. Wearing the right PPE reduces the risk of injury:
- Safety Glasses: Protect your eyes from debris (e.g., metal shavings, concrete dust) that may dislodge when loosening the bit. Even small particles can cause eye irritation or scratches.
- Work Gloves: Provide grip when using tools like wrenches or pliers, and protect your hands from sharp edges (e.g., a broken bit) or heat (e.g., a heated chuck). Nitrile gloves are ideal—they are durable, chemical-resistant (if using lubricants), and offer good grip.
- Ear Protection (Optional): If using power tools for removal (e.g., a heat gun with a loud fan), wear earplugs or earmuffs to avoid noise-induced hearing damage.
- Heat-Resistant Gloves (If Using Heat): If you plan to heat the chuck (see Section 3.2), use heat-resistant gloves (e.g., leather or silicone-coated gloves) to avoid burns.
A wobbly drill is harder to work with and increases the risk of tools slipping. Secure the drill using one of the following methods:
- Workbench Vise: Clamp the drill’s body (not the chuck or bit) into a workbench vise. Use soft jaws (e.g., rubber or wood inserts) to prevent scratching the drill’s housing. Ensure the chuck is facing upward or outward, so you have easy access to it.
- Clamp or C-Clamp: If you don’t have a vise, use a C-clamp to secure the drill to a sturdy workbench. Wrap a cloth around the drill’s body before clamping to protect the surface.
- Stable Surface: If no clamps are available, place the drill on a flat, non-slip surface (e.g., a rubber mat) and hold it firmly with one hand while working with the other. Avoid holding the drill in the air—this increases the risk of tools slipping.
Before starting removal, visually inspect the drill and bit to identify any pre-existing damage. This helps you avoid worsening the problem:
- Chuck Inspection: Check for cracks in the chuck housing (plastic or metal), misaligned jaws, or debris buildup. If the chuck is cracked, avoid applying too much pressure (it may break further). If debris is visible, try blowing it out with compressed air (see Section 3.3) before using other methods.
- Bit Inspection: Look for signs of bending, breakage, or galling (metal fusion) on the bit’s shank. If the bit is broken, note where the break occurred—if the shank is broken off inside the chuck, you may need a specialized tool (e.g., a broken bolt extractor) to remove it.
- Motor Inspection: Check if the drill’s motor is hot (from recent use). If it is, let it cool down for 15–30 minutes before attempting removal—working with a hot motor increases the risk of burns and may damage the drill’s internal components.
Having the right tools on hand saves time and reduces frustration. Below is a list of tools commonly used to remove stuck drill bits, along with their purposes and examples of reliable models:
- Adjustable Wrenches: Used to grip and turn the chuck or bit. Choose a 10–12 inch wrench for larger drills (e.g., DeWalt DW511) and an 8-inch wrench for smaller drills (e.g., Milwaukee 2604-20). Recommended models: Craftsman 9-44771 (10-inch), Irwin 2078708 (8-inch).
- Channel-Lock Pliers: Provide a stronger grip than wrenches, ideal for loosening tight chucks. Use pliers with rubber-coated jaws to avoid scratching the chuck. Recommended model: Channellock 440 (10-inch).
- Lubricant: Penetrating lubricants (e.g., WD-40 Specialist Penetrant) or silicone-based lubricants (e.g., 3M Silicone Lubricant) help loosen stuck parts by reducing friction. Avoid oil-based lubricants—they can attract more debris.
- Heat Source: A propane torch (e.g., Bernzomatic ST2200) or heat gun (e.g., DeWalt D26960K) is used to heat the chuck and expand the metal, breaking bonds between the bit and chuck.
- Compressed Air Can or Air Compressor: Used to blow debris out of the chuck. Recommended: Falcon Dust-Off Compressed Gas Duster (for small debris) or Porter-Cable C2002 Air Compressor (for heavy debris).
- Drill Chuck Removal Tool: Specialized tools designed to loosen stuck chucks. Recommended models: Irwin 227100 Chuck Key Wrench, RIDGID 31108 Chuck Removal Tool.
- Broken Bolt Extractor Set: Used if the bit breaks off inside the chuck. Recommended model: Irwin 53518 Hanson Spiral Flute Extractor Set.
Once you’ve taken the necessary safety precautions, you can begin removing the stuck bit. The method you choose depends on the cause of the sticking (e.g., debris, overheating, wear) and the drill’s brand/model. Below are six proven methods, ordered from simplest (least invasive) to most complex (requiring disassembly), with detailed steps, tool usage, and brand-specific examples.
This method is ideal for minor sticking caused by overtightening or slight debris buildup. It uses adjustable wrenches to apply controlled torque to the chuck and bit, breaking the stuck bond.
- Secure the drill in a workbench vise (with soft jaws) so the chuck faces upward. Ensure the vise is tight enough to hold the drill steady but not so tight that it damages the housing.
- Select two adjustable wrenches: one for the chuck’s outer sleeve (to hold it in place) and one for the drill bit’s shank (to turn it). Adjust the wrenches to fit snugly—too loose, and they may slip; too tight, and they may scratch the metal.
Most drill chucks loosen in a counterclockwise direction (when viewed from the front of the drill). Confirm this by checking the drill’s manual or looking for arrows on the chuck (some brands, like Bosch, mark the direction).
- Place one wrench on the chuck’s outer sleeve (the part that rotates to tighten/loosen the jaws). Hold this wrench firmly to prevent the chuck from spinning.
- Place the second wrench on the drill bit’s shank (as close to the chuck as possible to avoid bending the bit). Grip this wrench and turn it counterclockwise with steady pressure. Start with light pressure—if the bit doesn’t move, gradually increase pressure.
- If the wrench slips, wrap a piece of cloth around the chuck or bit shank to increase grip. Avoid using oil—this will make the wrench slip more.
- If the bit still doesn’t move, tap the end of the wrench (gently) with a hammer to apply additional torque. Be careful not to hit the drill’s housing or the wrench too hard—this can damage the chuck or bit.
The Bosch GSB 13 RE has a metal chuck outer sleeve (more durable than plastic), making it safe to use wrenches. A user with a stuck bit from overtightening can follow these steps:
- Secure the GSB 13 RE in a vise, clamping the body (not the chuck).
- Use a 10-inch wrench on the chuck’s outer sleeve and an 8-inch wrench on the bit shank.
- Hold the sleeve wrench steady and turn the bit wrench counterclockwise. The metal sleeve will withstand the pressure, and the bit should loosen within 1–2 turns.
The Black+Decker BDD716C2 has a plastic chuck housing, so avoid applying too much pressure to the sleeve. Instead:
- Wrap a cloth around the plastic sleeve to protect it, then attach the wrench.
- Use lighter pressure when turning the bit wrench—if the sleeve starts to flex, stop and try a different method (e.g., lubrication).
This method is effective for stuck bits caused by overheating or metal galling. Heating the chuck expands the metal, creating space between the chuck and bit shank, making it easier to loosen.
- Choose a heat source: A propane torch is ideal for metal chucks (e.g., DeWalt DW511), while a heat gun is better for plastic-chuck drills (e.g., Black+Decker BDD716C2) (torches can melt plastic).
- Put on heat-resistant gloves and safety glasses. Clear the area of flammable materials (e.g., paper, oil rags) to avoid fires.
- For Metal Chucks: Hold the propane torch 2–3 inches away from the chuck’s base (where the chuck meets the drill body). Heat the chuck in a circular motion for 20–30 seconds—you want the metal to warm up (but not glow red). Overheating can damage the drill’s internal components (e.g., bearings).
- For Plastic Chucks: Set the heat gun to low (200–250°F/93–121°C) and hold it 4–5 inches away from the chuck. Heat the chuck for 30–45 seconds, moving the heat gun constantly to avoid melting the plastic.
- After heating, let the chuck cool for 10–15 seconds (it will still be warm, so keep wearing gloves).
- Use adjustable wrenches (as in Method 1) to turn the bit counterclockwise. The heated metal will have expanded, then contracted slightly, breaking the bond between the chuck and bit.
Once the bit is removed, wipe the chuck with a clean cloth to remove any residue (e.g., oxidized metal). If galling occurred, use a wire brush to clean the jaws, then apply a small amount of lubricant to prevent future sticking.
The DeWalt DCD791D2 has a hardened steel chuck and a brushless motor (sensitive to heat). To avoid damaging the motor:
- Use a propane torch but focus heat only on the chuck (not the motor housing). Heat for 20 seconds max.
- After cooling, use a 10-inch wrench on the chuck sleeve and a 8-inch wrench on the bit. The bit should loosen easily—brushless motors don’t overheat as quickly, so the chuck is the only part that needs heating.
The Makita HP1641 is a concrete-focused drill with a metal chuck. If the bit is stuck due to galling:
- Heat the chuck with a torch for 30 seconds.
- Cool for 15 seconds, then use channel-lock pliers (for extra grip) to turn the bit counterclockwise. The concrete dust may have hardened, but the heat will break it up, making removal easier.
Lubrication is perfect for stuck bits caused by debris buildup or dry, worn chucks. Penetrating lubricants seep into small gaps (e.g., between the chuck jaws) to dissolve debris and reduce friction.
- Penetrating Lubricant: Use for debris or galling (e.g., WD-40 Specialist Penetrant, PB Blaster). These lubricants have solvents that break down rust and debris.
- Silicone Lubricant: Use for dry, worn chucks (e.g., 3M Silicone Lubricant). Silicone lubricants don’t attract dust and are safe for plastic and metal.
- Tilt the drill so the chuck faces downward. This allows the lubricant to seep into the jaws, not the drill’s motor.
- Spray or 滴 (drip) the lubricant into the gaps between the chuck’s jaws and the outer sleeve. Apply 2–3 squirts/drops—too much lubricant will attract more debris later.
- Let the lubricant sit for 10–15 minutes (longer if the bit is very stuck). This gives the lubricant time to dissolve debris and penetrate tight spaces.
- After waiting, hold the drill in one hand and turn the chuck’s outer sleeve clockwise (to tighten slightly) then counterclockwise (to loosen). This back-and-forth motion helps the lubricant spread and loosens the jaws.
- If the sleeve is hard to turn, use adjustable wrenches (Method 1) to apply gentle torque. The lubricant should have reduced friction, making the bit easier to remove.
Once the bit is removed, wipe the chuck with a clean cloth to remove excess lubricant. Use compressed air to blow out any remaining debris from the jaws. For long-term maintenance, apply a small amount of silicone lubricant to the jaws every 3 months.
The Milwaukee 2804-20 is an industrial-grade drill with a heavy-duty chuck prone to concrete dust buildup. To remove a stuck bit:
- Tilt the drill downward and spray WD-40 Specialist into the chuck jaws.
- Let sit for 15 minutes (concrete dust is tough, so extra time helps).
- Use channel-lock pliers to turn the chuck sleeve back and forth. The lubricant will dissolve the dust, and the bit will slide out.
The Makita DHP481Z has a compact chuck that can trap wood shavings. For a stuck bit from shavings:
- Drip 2–3 drops of silicone lubricant into the chuck.
- Let sit for 10 minutes, then turn the sleeve back and forth by hand. The shavings will loosen, and the bit will come out without tools.
For severely stuck bits (e.g., broken bits, damaged chucks), a specialized drill chuck removal tool is the most effective solution. These tools are designed to grip the chuck’s internal components and apply precise torque, avoiding damage to the drill.
- Chuck Key Wrench: Used for chucks with a keyhole (older models, e.g., some Bosch GSB 13 RE). The key fits into the hole on the chuck’s side, allowing you to apply torque. Recommended: Irwin 227100 (fits most ½-inch chucks).
- Chuck Removal Tool: Used for keyless chucks (most modern drills, e.g., DeWalt DCD791D2). The tool has a threaded rod that screws into the chuck’s center, then a handle to apply torque. Recommended: RIDGID 31108 (works with ¼-inch to ½-inch chucks).
- Broken Bolt Extractor: Used if the bit breaks off inside the chuck. The extractor has a reverse-threaded tip that screws into the broken bit, allowing you to pull it out. Recommended: Irwin 53518 (for 1/8-inch to ½-inch bits).
- For Chuck Key Wrenches: Insert the key into the hole on the chuck’s side. Ensure it fits snugly—if it’s loose, use a different size key (ill-fitting keys can strip the hole).
- For Chuck Removal Tools: Unscrew the chuck’s jaws as far as possible (to expose the center thread). Screw the tool’s threaded rod into the center thread until it’s tight.
- For Broken Bolt Extractors: If the bit is broken, use a drill (smaller than the broken bit) to drill a ¼-inch hole into the center of the broken shank. This gives the extractor a place to grip.
- Chuck Key Wrench: Turn the key counterclockwise with steady pressure. The key multiplies torque, making it easier to loosen the chuck. If it’s still stuck, tap the end of the key with a hammer (gently) to break the bond.
- Chuck Removal Tool: Turn the tool’s handle counterclockwise. The threaded rod will pull the chuck’s jaws apart, releasing the bit. Continue turning until the bit slides out.
- Broken Bolt Extractor: Insert the extractor into the drilled hole. Turn it counterclockwise (using a wrench) until it grips the broken bit. Pull the extractor out—this will pull the broken bit out with it.
After removing the bit, check the chuck for damage (e.g., stripped threads, broken jaws). If the chuck is damaged, it will need to be replaced (see Section 6.1 for replacement tips). For keyless chucks, apply a small amount of lubricant to the center thread to keep it working smoothly.
The DeWalt DW511 has a keyless chuck that can get stuck if the internal threads wear down. To remove a stuck bit:
- Screw the RIDGID 31108 tool into the chuck’s center thread.
- Turn the tool’s handle counterclockwise—this will force the jaws apart.
- The bit will slide out once the jaws are loose. The tool’s precise torque avoids damaging the chuck’s threads.
If a bit breaks off inside the Bosch GSB 550’s chuck:
- Drill a ¼-inch hole into the broken bit shank (use a HSS drill bit).
- Insert the Irwin 53518 extractor into the hole.
- Turn the extractor counterclockwise with a wrench—this will grip the broken bit and pull it out.
If the bit is not fully 卡死 (e.g., stuck due to minor overheating or debris), you can use the drill’s own motor to apply counter-rotation (reverse) and loosen the bit. This method is only safe if the drill is in good working order and the bit is not broken.
- Ensure the drill is disconnected from power (corded) or the battery is removed (cordless) before adjusting the direction.
- Locate the direction switch (usually on the top or side of the drill, marked with “F” for forward and “R” for reverse). Slide the switch to “R” (reverse).
- Clamp the drill in a workbench vise (with soft jaws) so the chuck faces outward. Ensure the vise is tight enough to hold the drill steady—counter-rotation can cause the drill to spin if not secured.
- If the bit is sticking out of the chuck, wrap a cloth around the bit shank (to protect it from damage) and hold it with pliers. This prevents the bit from spinning when the drill is turned on.
- Reconnect the drill to power (or reinsert the battery).
- Hold the pliers firmly on the bit shank, then press the drill’s trigger gently (start with low speed). The drill will rotate in reverse, applying torque to the chuck and bit.
- If the bit starts to loosen, continue pressing the trigger slowly until the bit is fully removed. If it doesn’t move after 2–3 seconds, stop—applying more power can burn out the motor.
After removing the bit, turn off the drill and disconnect power. Check the motor for overheating (if it’s hot, let it cool for 30 minutes). Inspect the chuck’s jaws for damage—counter-rotation can put stress on the jaws, so look for bending or misalignment.
The Milwaukee 2604-20 is a 12V cordless drill with a low-power motor (ideal for light reverse use). For a slightly stuck bit:
- Set the drill to reverse and clamp it in a vise.
- Wrap a cloth around the bit and hold with pliers.
- Press the trigger on low speed— the motor’s torque is enough to loosen the bit without overheating.
The DeWalt DCD791D2 has a powerful brushless motor—avoid using high speed for reverse. For a stuck bit:
- Set the drill to reverse and low speed.
- Clamp the drill and hold the bit with pliers.
- Press the trigger gently— the brushless motor provides smooth torque, and the bit will loosen without motor strain.
If all other methods fail, the chuck may need to be disassembled to remove debris or repair damaged parts. This method is more advanced and should only be attempted if you are comfortable working with small mechanical parts.
- For Keyless Chucks: Most keyless chucks are attached to the drill’s spindle (the metal rod that connects the chuck to the motor) with a setscrew. Locate the setscrew (usually inside the chuck, at the base of the jaws). Use a hex wrench (Allen wrench) to unscrew the setscrew counterclockwise. Once the setscrew is removed, twist the chuck counterclockwise to unscrew it from the spindle.
- For Keyed Chucks: Keyed chucks are often held in place by a nut. Remove the chuck key, then use a wrench to unscrew the nut counterclockwise. Once the nut is removed, pull the chuck off the spindle.
- Place the chuck on a clean workbench and lay out the parts in order (to avoid losing them). Most chucks consist of:
- Outer sleeve (the part you turn to tighten/loosen).
- Jaws (3 or 4 metal claws).
- Threaded ring (inside the sleeve, moves the jaws in/out).
- Spring (keeps the jaws aligned).
- Gently pry the outer sleeve off the chuck body (use a flathead screwdriver wrapped in cloth to avoid scratching). Remove the jaws, threaded ring, and spring.
- Use a wire brush to remove debris from the jaws and threaded ring (concrete dust or metal shavings). For stubborn debris, soak the parts in warm, soapy water for 10 minutes, then scrub.
- Dry all parts thoroughly with a clean cloth (moisture can cause rust). Inspect the parts for damage: if the jaws are bent, the threaded ring is stripped, or the spring is broken, replace the chuck (see Section 6.1).
- Reassemble the chuck in reverse order: spring → threaded ring → jaws → outer sleeve. Ensure the jaws move smoothly when you turn the outer sleeve.
- Screw the chuck back onto the drill’s spindle clockwise until it’s tight. Reinstall the setscrew (or nut) and tighten with a hex wrench (or wrench).
Reinsert a drill bit and test the chuck’s tightening/loosening mechanism. If the chuck works smoothly, the issue is resolved. If not, the chuck may need to be replaced.
The Bosch GSB 550’s keyless chuck has a 3mm hex setscrew inside. To disassemble:
- Use a 3mm hex wrench to remove the setscrew.
- Twist the chuck counterclockwise to remove it from the spindle.
- Pry off the outer sleeve, clean the jaws and threaded ring (concrete dust is common), then reassemble.
- Reattach the chuck to the spindle and test— the GSB 550’s chuck is durable, so cleaning usually fixes sticking.
The Makita HP1641’s chuck has a spring that can get clogged with debris. To fix:
- Disassemble the chuck and remove the spring.
- Clean the spring with compressed air, then lubricate it with silicone.
- Reassemble the chuck— the spring will now keep the jaws aligned, preventing future sticking.
Each impact drill brand designs its chucks, motors, and housing differently—these differences influence how you should remove a stuck bit. Below is a detailed breakdown of top brands (Bosch, DeWalt, Makita, Milwaukee, Black+Decker), their most popular models, and brand-specific tips for removing stuck bits.
Bosch is known for reliable, mid-range impact drills with precision-engineered chucks (often automatic-locking or manual-locking). Their chucks are durable but can be prone to wear if used for heavy-duty tasks (e.g., daily concrete drilling). Key considerations:
- Chuck Material: Most Bosch drills have metal jaws with plastic outer sleeves (e.g., GSB 550) or all-metal chucks (e.g., GSB 13 RE). Plastic sleeves are lighter but can crack if overtightened.
- Motor Type: Corded models (e.g., GSB 550, GSB 13 RE) have powerful induction motors, while cordless models (e.g., GSB 18V-55) have brushless motors. Brushless motors are more sensitive to heat, so avoid overheating the chuck.
- Key Specs: 550W power, automatic-locking three-jaw chuck, max drill diameter 13mm (metal), 10mm (concrete), weight 1.7kg.
- Common Sticking Causes: Chuck wear (after 2+ years of use), concrete dust accumulation, overheating during metal drilling.
- Removal Tips:
- For dust buildup: Use compressed air to blow out the chuck, then apply silicone lubricant.
- For overheating: Heat the chuck with a heat gun (low setting) for 30 seconds, then use adjustable wrenches to loosen the bit.
- For wear: If the jaws are worn, disassemble the chuck and replace the jaws (Bosch part number: 1600A001L0).
- Key Specs: 600W power, manual-locking three-jaw chuck (metal sleeve), max drill diameter 13mm (metal), 10mm (concrete), weight 1.9kg.
- Common Sticking Causes: Overtightening the manual chuck, misaligned bit installation, metal galling.
- Removal Tips:
- For overtightening: Use channel-lock pliers (with cloth) to turn the metal sleeve counterclockwise— the metal sleeve can withstand more pressure than plastic.
- For misalignment: Apply lubricant to the jaws, then use a wrench to turn the bit back and forth (this realigns the shank).
- For galling: Use a penetrating lubricant (WD-40 Specialist) and let sit for 15 minutes, then use a chuck key wrench (if available) to loosen.
DeWalt specializes in heavy-duty impact drills (both corded and cordless) with hardened steel chucks and brushless motors. Their drills are designed for professional use (e.g., construction, metalworking) and can handle high torque, but their chucks can get stuck due to galling or debris. Key considerations:
- Chuck Design: Most DeWalt drills have keyless, automatic-locking chucks (e.g., DCD791D2) with reinforced jaws for heavy use.
- Motor Sensitivity: Brushless motors (common in cordless models) are powerful but can overheat if used in reverse for too long—limit reverse use to 2–3 seconds at a time.
- Key Specs: 18V brushless motor, automatic-locking three-jaw chuck, max drill diameter 13mm (metal), 10mm (concrete), weight 1.6kg.
- Common Sticking Causes: Metal galling (drilling steel without cooling), debris (concrete dust), overheating.
- Removal Tips:
- For galling: Heat the chuck with a propane torch (20 seconds) then use a chuck removal tool (RIDGID 31108) to loosen the bit— avoid reverse (brushless motor is sensitive).
- For debris: Use compressed air (Porter-Cable C2002) to blow out dust, then apply silicone lubricant.
- For overheating: Let the motor cool for 30 minutes, then use adjustable wrenches to loosen the bit.
- Key Specs: 800W induction motor, manual-locking three-jaw chuck (all-metal), max drill diameter 13mm (metal), 16mm (concrete), weight 2.5kg.
- Common Sticking Causes: Broken bits (drilling reinforced concrete), overtightening, concrete dust buildup.
- Removal Tips:
- For broken bits: Use a broken bolt extractor (Irwin 53518)— drill a hole in the broken shank, insert the extractor, and pull out.
- For overtightening: Use a chuck key wrench (Irwin 227100) to apply torque— the manual chuck responds well to keyed torque.
- For dust buildup: Disassemble the chuck, clean the jaws with a wire brush, then reassemble with lubricant.
Makita drills are known for their lightweight design, ergonomic grips, and smooth chuck operation—ideal for woodworking, electrical work, and light concrete drilling. Their chucks are compact (prone to debris trapping) but easy to disassemble for cleaning. Key considerations:
- Chuck Size: Makita’s cordless drills (e.g., DHP481Z) have smaller chucks (max 13mm) that can trap small debris (e.g., wood shavings).
- Material Focus: Many Makita models (e.g., HP1641) are optimized for concrete, so their chucks are designed to resist dust but can still get stuck if not cleaned.
- Key Specs: 710W induction motor, automatic-locking three-jaw chuck, max drill diameter 16mm (concrete), 13mm (metal), weight 2.1kg.
- Common Sticking Causes: Concrete dust buildup, overheating (long drilling sessions), bit misalignment.
- Removal Tips:
- For dust buildup: Tilt the drill downward, spray penetrating lubricant into the jaws, let sit 15 minutes, then use pliers to turn the bit.
- For overheating: Use a heat gun (low setting) on the chuck, cool 10 seconds, then use wrenches to loosen.
- For misalignment: Disassemble the chuck, realign the jaws, then reassemble— Makita’s chuck parts are easy to access.
- Key Specs: 18V brushless motor, automatic-locking three-jaw chuck, max drill diameter 13mm (metal), 10mm (concrete), weight 1.4kg.
- Common Sticking Causes: Wood shavings (woodworking), minor overheating, dry chuck (lack of lubrication).
- Removal Tips:
- For wood shavings: Use compressed air to blow out the chuck, then wipe with a cloth— no lubricant needed (shavings are soft).
- For overheating: Let the drill cool 20 minutes, then turn the chuck sleeve back and forth by hand— the lightweight design makes manual loosening easy.
- For dry chuck: Apply a drop of silicone lubricant to the jaws, then work the sleeve back and forth— this prevents future sticking.
Milwaukee drills are industrial-grade, designed for heavy-duty tasks (e.g., drilling steel, reinforced concrete) with high-torque motors and rugged chucks. Their chucks are made of hardened steel (resistant to wear) but can get stuck due to extreme pressure or debris. Key considerations:
- Chuck Durability: Milwaukee’s chucks (e.g., 2804-20) can withstand high torque, so you can use more force (e.g., hammering wrenches) without damaging them.
- Debris Resistance: Industrial models (e.g., 2804-20) have sealed chucks to prevent debris, but they can still get stuck if the seal is damaged.
- Key Specs: 18V brushless motor (high torque: 575 in-lbs), automatic-locking three-jaw chuck, max drill diameter 13mm (metal), 10mm (concrete), weight 1.8kg.
- Common Sticking Causes: Metal galling (drilling thick steel), debris (concrete dust), broken bits (reinforced concrete).
- Removal Tips:
- For galling: Heat the chuck with a propane torch (30 seconds), cool 15 seconds, then use channel-lock pliers to turn the bit— the steel chuck can handle high heat.
- For debris: Use a chuck removal tool (RIDGID 31108) to force the jaws apart— the tool’s torque is matched to Milwaukee’s high-torque design.
- For broken bits: Use a heavy-duty extractor (Irwin 53518) and apply more torque— Milwaukee’s chuck is strong enough to withstand it.
- Key Specs: 12V brushless motor (light torque: 200 in-lbs), automatic-locking three-jaw chuck, max drill diameter 10mm (metal), 8mm (concrete), weight 1.1kg.
- Common Sticking Causes: Incorrect bit installation (DIY users), minor debris (drywall dust), overtightening.
- Removal Tips:
- For incorrect installation: Use adjustable wrenches (small size: 8-inch) to turn the bit counterclockwise— the light torque means less force is needed.
- For drywall dust: Blow out with compressed air, then wipe with a cloth— drywall dust is fine and easy to remove.
- For overtightening: Use a small chuck key wrench (if available) to loosen— the compact chuck responds well to precise torque.
Black+Decker drills are budget-friendly, designed for DIY users (e.g., home repairs, light woodworking) with lightweight plastic housings and basic chucks. Their chucks are less durable than professional models (prone to cracking) but easy to maintain with simple methods. Key considerations:
- Chuck Material: Most Black+Decker drills (e.g., BDD716C2) have plastic chuck housings— avoid heavy tools (e.g., large wrenches) that can crack the plastic.
- Motor Power: Low-power motors (e.g., 18V cordless) mean less overheating, so sticking is usually caused by debris or incorrect installation.
- Key Specs: 18V motor, automatic-locking three-jaw chuck (plastic housing), max drill diameter 10mm (concrete), 8mm (metal), weight 1.3kg.
- Common Sticking Causes: Plastic chuck cracking (overtightening), wood shavings, bit misalignment.
- Removal Tips:
- For cracked chucks: Avoid tools— wrap a cloth around the sleeve, turn by hand, and replace the chuck (Black+Decker part number: 90592364) after removal.
- For wood shavings: Use a toothbrush to brush out debris, then apply a drop of lubricant— plastic chucks don’t need much lubricant.
- For misalignment: Gently twist the bit back and forth by hand— the low-power motor means the bit isn’t under much pressure.
- Key Specs: 18V motor, manual-locking three-jaw chuck (plastic sleeve), max drill diameter 10mm (concrete), 8mm (metal), weight 1.5kg.
- Common Sticking Causes: Manual sleeve sticking (dry), debris (drywall dust), overtightening.
- Removal Tips:
- For dry sleeves: Apply a small amount of silicone lubricant to the sleeve’s threads, then turn back and forth by hand— plastic threads need lubrication to move smoothly.
- For drywall dust: Wipe the chuck with a damp cloth (avoid getting water in the motor), then dry thoroughly.
- For overtightening: Use a small adjustable wrench (8-inch) with a cloth to protect the plastic, then turn counterclockwise— apply light pressure to avoid cracking.
Preventing a stuck drill bit is easier than removing one. By following these strategies, you can extend the life of your drill and chuck, reduce downtime, and avoid tool damage. The tips below are tailored to different causes of sticking (e.g., debris, overheating, wear) and include brand-specific maintenance advice.
Using the correct bit for the material is the most effective way to prevent sticking. Mismatched bits lead to overheating, deformation, and breakage—all of which cause sticking. Below is a guide to bit types and their ideal materials:
- Brand-Specific Tip for DeWalt DCD791D2: Use DeWalt’s cobalt steel bits (e.g., DW1354) for metal drilling—they resist overheating, which is critical for the drill’s brushless motor.
- Brand-Specific Tip for Makita HP1641: Use Makita’s carbide-tipped bits (e.g., D-00844) for concrete—they are designed to work with the drill’s power, reducing dust buildup.
Debris buildup is a leading cause of sticking, so cleaning the chuck after each use (or at least once a week for frequent use) is essential. Follow these steps:
- Remove the Bit: Always remove the bit after use to access the chuck’s jaws.
- Blow Out Debris: Use a compressed air can (e.g., Falcon Dust-Off) or air compressor to blow debris out of the jaws and between the chuck and motor housing. Hold the drill upside down to let debris fall out.
- Wipe the Chuck: Use a clean, dry cloth to wipe the chuck’s outer sleeve and jaws. For stubborn debris (e.g., concrete dust), use a wire brush (soft-bristle) to scrub the jaws.
- Avoid Water: Never use water to clean the chuck—moisture can cause rust. If debris is sticky (e.g., wood sap), use a small amount of rubbing alcohol on a cloth to dissolve it.
- Brand-Specific Tip for Milwaukee 2804-20: The drill’s sealed chuck prevents most debris, but check the seal monthly—if it’s cracked, replace it (Milwaukee part number: 49-22-0100) to keep debris out.
- Brand-Specific Tip for Black+Decker BDD716C2: The plastic chuck is prone to trapping small debris—use a toothbrush to clean the jaw gaps, as compressed air may not reach tight spaces.
Dry chucks have more friction, leading to sticking and wear. Lubricating the chuck every 3 months (or more often for heavy use) keeps the jaws moving smoothly. Follow these steps:
- Choose the Right Lubricant: Use silicone-based lubricant (e.g., 3M Silicone Lubricant) for all chucks—oil-based lubricants attract dust. Avoid WD-40 as a long-term lubricant (it’s a penetrant, not a lubricant).
- Apply Lubricant: Tilt the drill downward, apply 1–2 drops of lubricant to the jaws and the chuck’s inner threads (if accessible).
- Work the Chuck: Turn the chuck’s outer sleeve clockwise and counterclockwise 5–10 times to spread the lubricant evenly.
- Wipe Excess: Use a clean cloth to wipe excess lubricant from the outer sleeve—this prevents dust from sticking.
- Brand-Specific Tip for Bosch GSB 550: The automatic-locking chuck has internal gears that need lubrication—apply a small amount of lubricant to the gear teeth (accessible when the chuck is disassembled) every 6 months.
- Brand-Specific Tip for Makita DHP481Z: The compact chuck has limited space, so use a precision oiler (e.g., Lucas Oil 10005) to apply lubricant—this avoids over-lubrication.
Incorrect installation is a preventable cause of sticking. Follow these steps to install bits properly:
- Clean the Bit and Chuck: Wipe the bit’s shank and the chuck’s jaws with a cloth to remove debris—dirty surfaces cause uneven clamping.
- Insert the Bit Fully: Push the bit’s shank into the chuck until it hits the bottom. This ensures the jaws clamp evenly around the shank.
- Center the Bit: Hold the bit straight (parallel to the drill’s body) while inserting it—misalignment causes uneven pressure.
- Tighten Appropriately:
- Keyless Chucks: Turn the outer sleeve clockwise until it’s tight—no need to use tools (overtightening damages jaws).
- Keyed Chucks: Use the chuck key to tighten the jaws—turn the key until it’s snug, then stop (overtightening strips the keyhole).
- Brand-Specific Tip for DeWalt DW511: The manual-locking chuck requires a key—use the correct size key (DeWalt part number: N129071) to avoid stripping the hole.
- Brand-Specific Tip for Black+Decker HD18PD: The manual sleeve is plastic—tighten by hand only (no tools) to avoid cracking the sleeve.
Correct drilling techniques reduce friction, overheating, and pressure—all of which prevent sticking. Follow these tips:
- Control Speed: Match the drill’s speed to the material:
- Wood: High speed (1,500–3,000 RPM).
- Metal: Low speed (300–1,000 RPM) to avoid overheating.
- Concrete: Medium speed (800–1,500 RPM) with impact mode.
- Use Cooling Agents: For metal drilling, apply cutting oil (e.g., DeWalt DW3128) or water to the bit—this reduces heat and prevents galling. For concrete, use water to keep the bit cool and reduce dust.
- Avoid Over-Pressuring: Apply light, even pressure—let the drill do the work. Too much pressure bends the bit, causing it to stick.
- Pause to Cool: For long drilling sessions (e.g., 5+ minutes), pause every 1–2 minutes to let the bit and chuck cool. This prevents overheating and expansion.
- Brand-Specific Tip for Milwaukee 2804-20: The drill’s high torque can cause over-pressuring—use the torque control setting (if available) to limit pressure, preventing bit bending.
- Brand-Specific Tip for Makita HP1641: The drill’s impact mode is powerful—use it only for concrete (not metal or wood) to avoid unnecessary wear on the chuck.
Regular inspections catch wear and damage early, preventing sticking. Check the following monthly (or before each use for heavy users):
A drill’s motor is responsible for delivering consistent torque and speed to the chuck—when it malfunctions, this consistency breaks down, creating conditions that trap the bit. Here’s a detailed breakdown of common motor issues and their direct impact on bit sticking:
-
Uneven Torque Delivery: A worn motor (e.g., due to brush wear in corded models like Bosch GSB 550) may alternate between high and low torque during drilling. When torque drops suddenly, the bit slows down while the user continues applying pressure—this forces the bit’s shank against the chuck jaws, creating a wedge effect that jams the bit. For example, a Bosch GSB 550 with worn carbon brushes might work normally for 10 seconds, then lose torque mid-drill into wood. The user, not noticing the torque drop, pushes harder, causing the bit to shift and get stuck in the chuck.
-
Overheating Motors: Motors that overheat (common in corded drills like DeWalt DW511 used for extended concrete drilling) can seize up temporarily or reduce power output. When a motor overheats, it may slow down or stop abruptly while the bit is still engaged with the material. The bit, now stationary but under pressure, becomes wedged between the material and the chuck—even if the chuck jaws are functional, the material’s resistance keeps the bit stuck. For instance, a DeWalt DW511 used to drill 10+ 16mm concrete holes in a row may overheat, causing the motor to stall. The bit, still embedded in concrete, is held tight by the material, making it impossible to remove from the chuck until the material is cleared (a step that requires extra effort due to the stuck connection).
-
Power Fluctuations (Cordless Drills): Cordless drills like Milwaukee 2604-20 rely on battery power—if the battery is old or the terminals are corroded, power delivery becomes inconsistent. This inconsistency can cause the drill to “surge” (suddenly increase speed) or “lag” (slow down) while drilling. A surge can cause the bit to spin too fast, generating excess heat that expands the shank and jams it in the chuck. A lag, by contrast, leads to the same wedge effect as uneven torque— the user pushes harder, and the bit gets stuck. For example, a Milwaukee 2604-20 with a 3-year-old battery might surge when drilling aluminum, heating the bit shank to the point where it expands and sticks in the chuck once the drill is turned off.
To prevent motor-related stuck bits, perform a thorough motor inspection before each heavy-use session. Follow these steps, tailored to both corded and cordless drill types:
-
Visual Inspection:
- Corded Drills (e.g., Bosch GSB 13 RE, DeWalt DW511): Check the power cord for fraying, cracks, or exposed wires—damaged cords cause power fluctuations. Inspect the motor housing for signs of overheating (discoloration, melted plastic) or oil leaks (indicative of bearing failure). For example, a DeWalt DW511 with a discolored motor housing (yellow or brown spots) has likely overheated repeatedly, increasing the risk of future stalls and stuck bits.
- Cordless Drills (e.g., Makita DHP481Z, Black+Decker BDD716C2): Examine the battery compartment for corrosion (white or green buildup on terminals) or loose connections. Remove the battery and check the prongs on both the battery and drill—bent prongs cause poor contact, leading to power issues. A Makita DHP481Z with corroded terminals may work intermittently, increasing the chance of a stuck bit during a power lag.
-
Sound Inspection:
- Turn on the drill (without a bit inserted) and listen to the motor. A healthy motor should produce a smooth, consistent hum—no grinding, clicking, or squealing noises.
- Grinding Noises: Indicate worn bearings (common in older drills like Bosch GSB 550). Bearings allow the motor shaft to spin freely—when worn, the shaft rubs against the housing, causing uneven rotation. A Bosch GSB 550 with grinding bearings may deliver erratic torque, leading to a stuck bit.
- Clicking Noises: In cordless drills (e.g., Milwaukee 2804-20), clicking often means a loose battery connection. Each click corresponds to a momentary loss of power, which can cause the bit to slow and get stuck.
- Squealing Noises: Suggest worn carbon brushes (in corded drills) or a misaligned motor shaft. Worn brushes create arcing inside the motor, leading to power spikes that heat the bit shank. A DeWalt DW511 with squealing brushes may overheat the bit, causing it to expand and stick in the chuck.
-
Heat Test:
- Run the drill at full speed (without a bit) for 30 seconds, then turn it off and touch the motor housing (use the back of your hand to avoid burns). A healthy motor should feel warm but not hot—if it’s too hot to touch, it’s overheating.
- For corded drills like Makita HP1641, overheating during this test means the motor is likely worn and needs repair. For cordless drills like Black+Decker HD18PD, excessive heat may indicate a faulty battery (replace the battery before using the drill to prevent stuck bits).
-
Torque and Speed Test:
- Insert a test bit (e.g., a 6mm HSS bit) into the chuck and clamp it securely.
- Drill into a scrap piece of material (wood for HSS bits) at the recommended speed. Pay attention to how the drill performs:
- Does it maintain consistent speed, or does it slow down when pressure is applied?
- Does the torque feel steady, or does it fluctuate?
- If the drill slows significantly under light pressure (e.g., drilling pine with a Milwaukee 2604-20), the motor is not delivering enough power—this increases the risk of a stuck bit, as the user will need to push harder to compensate.
Different drill brands have unique motor designs, so maintenance steps vary. Below are tips tailored to top models, helping you keep the motor in good condition and prevent stuck bits:
-
Bosch GSB 550 (Corded):
This drill uses carbon brushes in its motor—replace them every 50–100 hours of use (Bosch part number: 1609200036). Worn brushes cause uneven torque and overheating. To replace:
- Unplug the drill and remove the motor housing screws (use a Phillips-head screwdriver).
- Locate the two carbon brushes (small black blocks) on either side of the motor.
- Pull out the old brushes and insert the new ones, ensuring they fit snugly.
- Reattach the housing and test the drill—consistent torque will reduce the risk of stuck bits.
-
DeWalt DCD791D2 (Cordless Brushless):
Brushless motors (like this one) have no carbon brushes but still require maintenance. Every 6 months, clean the motor vents (located on the side of the housing) with compressed air to remove dust—clogged vents cause overheating. For example, if the vents are blocked with concrete dust, the motor will overheat during drilling, leading to power drops and stuck bits. Use a Falcon Dust-Off can to blow dust out of the vents—hold the can 4–5 inches away to avoid damaging the motor.
-
Makita HP1641 (Corded):
This concrete-focused drill has a sealed motor to prevent dust intrusion, but the seal can wear over time. Inspect the seal (around the motor housing where the spindle exits) every 3 months—if it’s cracked or missing, replace it (Makita part number: 629101-2). A broken seal allows concrete dust to enter the motor, causing bearing wear and uneven torque. For instance, a cracked seal on a Makita HP1641 may let dust damage the bearings, leading to grinding noises and stuck bits during concrete drilling.
-
Milwaukee 2804-20 (Cordless Brushless):
The battery is critical to motor performance—calibrate the battery every 3 months to ensure consistent power delivery. To calibrate:
- Fully charge the battery (use a Milwaukee M18 charger).
- Insert the battery into the drill and run the drill at full speed (without a bit) until the battery dies (this discharges it completely).
- Recharge the battery fully.
Calibration prevents power fluctuations that cause the motor to lag or surge, reducing the chance of a stuck bit. A calibrated battery in a Milwaukee 2804-20 will deliver steady torque when drilling steel, avoiding the heat buildup that expands the bit shank.
-
Black+Decker BDD716C2 (Cordless):
This budget drill has a basic motor that benefits from regular lubrication. Every 6 months, apply a drop of motor oil (e.g., 3-in-1 Motor Oil) to the motor bearings (accessible through small holes on the motor housing). Lubricated bearings spin freely, preventing overheating and uneven speed. For example, an unlubricated Black+Decker BDD716C2 may slow down during wood drilling, causing the user to push harder and jam the bit in the chuck.
Even after successfully removing a stuck drill bit, you may encounter secondary issues—such as a damaged chuck, broken bit fragments, or motor problems—that can affect future drill performance. Addressing these complications promptly prevents further damage and ensures your drill remains reliable. Below is a detailed troubleshooting guide for the most common post-removal issues, with brand-specific solutions and step-by-step fixes.
The chuck often bears the brunt of stuck bit removal—tools like wrenches, pliers, or heat sources can damage its components (jaws, outer sleeve, threads). A damaged chuck will not hold bits securely, leading to more stuck bits or even bit slippage during drilling.
- Jaw Misalignment: When the chuck is closed, the jaws do not meet at the center (e.g., one jaw sticks out further than the others). This causes uneven clamping, leading to bit wobble and sticking.
- Cracked Outer Sleeve: Plastic sleeves (e.g., Black+Decker BDD716C2) may crack after being squeezed by pliers or exposed to heat. Metal sleeves (e.g., DeWalt DW511) can crack if struck with a hammer during removal.
- Stripped Threads: The internal threads (that connect the chuck to the drill’s spindle) may strip if the chuck is unscrewed too forcefully (e.g., during Method 6: Disassembly). Stripped threads prevent the chuck from attaching securely to the spindle.
- Jaw Wear: The jaws have visible scratches, dents, or rounded edges—this reduces their grip on the bit shank, causing the bit to slip and get stuck.
- Excessive Force: Using large wrenches or pliers to loosen a stuck bit can bend the jaws or crack the sleeve. For example, a user may use a 12-inch wrench on a small Black+Decker HD18PD chuck (plastic sleeve), causing the sleeve to crack.
- Heat Damage: Overheating the chuck with a propane torch (e.g., for metal galling) can warp the jaws or melt plastic components. A Bosch GSB 550 with a plastic sleeve may have the sleeve melt if the torch is held too close.
- Incorrect Disassembly: Forcing the chuck apart during deep cleaning (Method 6) can break the threaded ring or spring that controls the jaws. A Makita DHP481Z’s threaded ring may strip if pried with a screwdriver instead of being gently removed.
Replacing a damaged chuck is straightforward and requires only basic tools. Follow these steps, with brand-specific part numbers and tips:
-
Identify the Chuck Type and Size:
- Check the drill’s manual or the old chuck for markings (e.g., “½-inch keyless” or “13mm keyed”). Most impact drills use ½-inch or ⅜-inch chucks—matching the size is critical for compatibility.
- For example, a DeWalt DCD791D2 uses a ½-inch keyless chuck (DeWalt part number: N173749), while a Black+Decker BDD716C2 uses a ⅜-inch keyless chuck (Black+Decker part number: 90592364).
-
Remove the Old Chuck:
- Step 1: Disconnect Power: Unplug corded drills (e.g., Bosch GSB 13 RE) or remove the battery from cordless models (e.g., Milwaukee 2804-20).
- Step 2: Remove the Setscrew (Keyless Chucks): Most keyless chucks have a setscrew (usually hex-headed) inside the chuck, at the base of the jaws. Use a hex wrench (Allen wrench) to unscrew the setscrew clockwise (it is reverse-threaded). For example, a Bosch GSB 550’s setscrew requires a 3mm hex wrench—turning it clockwise loosens it.
- Step 3: Unscrew the Chuck from the Spindle: Once the setscrew is removed, insert a large Allen wrench (e.g., ¼-inch) into the chuck and tighten the jaws around it. Hold the drill’s spindle (use a wrench on the spindle’s flats, if available) and turn the Allen wrench counterclockwise—this unscrews the chuck from the spindle. For cordless drills like Makita DHP481Z, you can also clamp the Allen wrench in a vise and twist the drill body counterclockwise.
- Step 4: Remove Keyed Chucks: Keyed chucks (e.g., older DeWalt DW511 models) are held in place by a locknut. Use a wrench to unscrew the locknut counterclockwise, then pull the chuck off the spindle.
-
Install the New Chuck:
- Step 1: Clean the Spindle: Wipe the spindle’s threads with a clean cloth to remove debris or old lubricant—this ensures a secure fit.
- Step 2: Screw the New Chuck On: Align the new chuck’s threads with the spindle and turn it clockwise by hand until it is tight. For a tighter fit, insert the Allen wrench into the chuck, tighten the jaws, and turn the wrench clockwise (use moderate force to avoid stripping threads).
- Step 3: Reinstall the Setscrew: For keyless chucks, insert the setscrew into the chuck’s center and tighten it counterclockwise (reverse-threaded) with a hex wrench. Ensure it is snug but not overtightened—overtightening can damage the chuck.
- Step 4: Test the New Chuck: Insert a drill bit and test the clamping mechanism—turn the outer sleeve (keyless) or use the key (keyed) to tighten and loosen the jaws. The bit should stay secure when pulled gently, with no wobble during drilling.
- Bosch GSB 550: Use Bosch part number 1600A001L0 for the chuck. When removing the old chuck, the setscrew is often tight—apply a drop of penetrating lubricant (WD-40) and let it sit for 5 minutes if it won’t budge.
- DeWalt DCD791D2: The new chuck (N173749) comes pre-lubricated, so no additional lubricant is needed. After installation, test the chuck by drilling a ½-inch hole in wood—ensure the bit stays centered and does not slip.
- Black+Decker BDD716C2: The plastic chuck (90592364) is lightweight—avoid using tools to tighten it by hand only to prevent cracking. After installation, check for jaw alignment by closing the chuck fully—if the jaws are misaligned, the chuck may be defective and need replacement.
- Milwaukee 2804-20: The chuck (Milwaukee part number 49-22-0120) has a sealed design—do not disassemble it for cleaning. If debris gets inside, use compressed air to blow it out through the jaw gaps.
In some cases, a stuck bit may break during removal—leaving small fragments (e.g., pieces of the shank or jaws) inside the chuck. These fragments can block the jaws from moving, prevent proper bit installation, or even damage new bits. Removing them requires patience and precision to avoid further chuck damage.
- Jaws Won’t Close Fully: When you turn the chuck’s outer sleeve, the jaws stop short of meeting at the center—indicating a fragment is blocking them.
- Grinding Noise When Turning the Sleeve: The fragment rubs against the jaws or threaded ring, creating a grinding sound.
- New Bit Won’t Insert: The fragment is wedged in the jaw gaps, preventing the bit’s shank from fitting into the chuck.
- Tweezers or Needle-Nose Pliers: For grabbing small, visible fragments (e.g., pieces of the bit shank).
- Compressed Air Can: To blow out tiny fragments (e.g., metal shavings) that are not visible.
- Magnifying Glass: To locate small fragments in tight spaces (e.g., between the jaws and outer sleeve).
- Flathead Screwdriver (Small): To gently pry fragments out of the jaw gaps (wrap the tip in cloth to avoid scratching the jaws).
- Magnet: A small, strong magnet (e.g., a neodymium magnet) can attract metal fragments, making them easier to retrieve.
-
Inspect the Chuck Thoroughly:
- Use a magnifying glass to look into the chuck’s jaw gaps, threaded ring, and center hole. Note the size and location of each fragment—visible fragments are easier to remove than hidden ones.
- For example, a broken fragment of a DeWalt DW5207 carbide bit (used in concrete drilling) may be wedged between two jaws of a Makita HP1641 chuck—visible as a small, sharp metal piece.
-
Remove Visible Fragments:
- Tweezers/Pliers: Grip the fragment gently with tweezers or needle-nose pliers (hold the pliers at a 45-degree angle to avoid slipping). Pull the fragment straight out—do not twist or pry, as this may push the fragment deeper.
- Magnet: If the fragment is magnetic (most steel bits are), hold the magnet near the fragment— it will stick to the magnet, allowing you to pull it out. For fragments in tight gaps, attach the magnet to the end of a screwdriver to reach deeper.
-
Clear Hidden Fragments:
- Compressed Air: Hold the drill upside down (chuck facing downward) and spray compressed air into the chuck’s center hole and jaw gaps. The air pressure will blow out tiny fragments (e.g., metal shavings) that are not visible. Use short bursts (1–2 seconds each) to avoid forcing fragments deeper.
- Screwdriver Pry: For fragments wedged between the jaws and outer sleeve, wrap a small flathead screwdriver’s tip in cloth (to protect the chuck) and gently pry the gap open. Once the fragment is loose, use tweezers to pull it out.
-
Test the Chuck After Removal:
- Close and open the chuck’s jaws several times to ensure they move smoothly. Insert a test bit (e.g., 6mm HSS) and check if it fits securely—no wobble or resistance means all fragments are removed.
- If the jaws still grind or won’t close, repeat the inspection—there may be a small fragment left. For example, a tiny metal shaving from a broken Milwaukee 48-89-2600 tile bit may be hidden in the threaded ring of a Black+Decker HD18PD chuck—requiring another round of compressed air to remove.
- Bosch GSB 13 RE: The chuck’s metal sleeve has small ventilation holes—fragments can get stuck in these holes. Use a thin wire (e.g., a paperclip unfolded) to poke into the holes and dislodge fragments, then blow them out with compressed air.
- DeWalt DCD791D2: The brushless motor’s spindle is close to the chuck—avoid using metal tools (e.g., screwdrivers) near the spindle, as they can scratch it. Use a plastic tool (e.g., a plastic pry tool) to remove fragments near the spindle.
- Makita DHP481Z: The compact chuck has narrow jaw gaps—use a pair of precision tweezers (e.g., jewelers’ tweezers) to remove small fragments. Do not use pliers, as they may damage the jaws.
- Black+Decker BDD716C2: The plastic chuck is soft—avoid using sharp tools (e.g., a screwdriver) to pry fragments, as this can scratch the plastic. Use a magnet or compressed air first, and only use a plastic tool if necessary.
Removing a stuck bit (especially using methods like counter-rotation or heat) can put stress on the drill’s motor, leading to post-removal issues like overheating, reduced power, or strange noises. These issues must be addressed immediately to prevent permanent motor damage.
- Persistent Overheating: The motor heats up quickly (within 10–15 seconds of use) even when drilling light materials (e.g., wood). This is often caused by damage to the motor windings during heat application (Method 2) or excessive torque during counter-rotation (Method 5).
- Reduced Power: The drill can no longer drill through materials it previously handled (e.g., a Milwaukee 2804-20 that now struggles to drill ½-inch steel). This may be due to worn bearings or a damaged armature (the rotating part of the motor) from forced counter-rotation.
- Intermittent Operation: The drill turns on and off randomly during use—caused by loose wiring or a damaged switch. This can happen if the drill was shaken violently during bit removal (e.g., when tapping a wrench with a hammer).
-
Overheating Motor:
- Check Vents: Ensure the motor vents are not blocked by debris (e.g., concrete dust). Use compressed air to blow out the vents—clogged vents trap heat, causing overheating.
- Inspect Windings: For corded drills (e.g., Bosch GSB 550), remove the motor housing and check the windings (copper wires) for discoloration (black or brown spots) or burns. Discolored windings mean the motor is damaged and needs professional repair or replacement.
- Test with Light Use: Run the drill at low speed (without a bit) for 30 seconds—if it still overheats, the motor is likely faulty. For example, a DeWalt DW511 that overheats after heat-based bit removal may have damaged windings and require a new motor (DeWalt part number: N097249).
-
Reduced Power:
- Check Bearings: Worn bearings cause friction, reducing motor power. To test, spin the drill’s spindle by hand—if it feels rough or doesn’t spin freely, the bearings are worn. Replace them with brand-specific bearings (e.g., Makita HP1641 uses bearing part number 6202ZZ).
- Inspect Armature: The armature (inside the motor) has copper commutator bars—if these bars are worn or burned, the motor will lose power. For cordless drills like Makita DHP481Z, a damaged armature requires motor replacement (Makita part number: 638522-2).
- Battery Check (Cordless): For drills like Black+Decker BDD716C2, reduced power may be due to a weak battery, not a faulty motor. Test the drill with a fully charged spare battery—if power improves, replace the old battery.
-
Intermittent Operation:
- Check Wiring: For corded drills, remove the motor housing and inspect the wires for loose connections or fraying. Tighten loose wires with a screwdriver (ensure the drill is unplugged) and replace frayed wires with new ones (match the wire gauge).
- Test the Switch: The switch (on/off and speed control) may be damaged. Use a multimeter to test for continuity—if there’s no continuity when the switch is on, it needs replacement. For example, a Milwaukee 2604-20 with intermittent operation may have a faulty switch (Milwaukee part number: 49-22-0171).
- Bosch GSB 550: Bosch offers replacement motor kits (part number 1609200040) that include the armature, bearings, and brushes. These kits are easy to install for DIY users and are more cost-effective than replacing the entire drill.
- DeWalt DCD791D2: The brushless motor is complex—do not attempt to repair it yourself. Contact DeWalt’s customer service for authorized repair, as improper repair can void the warranty.
- Makita DHP481Z: Makita’s motor parts are widely available—order a new armature (638522-2) and bearings (6202ZZ) online, then follow Makita’s official repair manual (available on their website) for installation.
- Black+Decker BDD716C2: Budget drills like this one often have non-repairable motors—if the motor is faulty, it’s more cost-effective to replace the entire drill than to repair the motor. Check Black+Decker’s warranty (most have a 2-year limited warranty) to see if the drill is covered.
To ensure your impact drill remains free of stuck bits and operates reliably for years, follow this comprehensive maintenance checklist. Perform these tasks monthly (for frequent use) or quarterly (for occasional use), and keep a log of maintenance to track your drill’s condition.
- Bosch GSB 550: Replace carbon brushes every 50 hours, lubricate chuck every month, and deep clean chuck every 6 months.
- DeWalt DCD791D2: Clean motor vents every 2 weeks (heavy use), calibrate battery every 3 months, and inspect switch annually.
- Makita HP1641: Replace bearings every 100 hours, lubricate motor every quarter, and test torque monthly.
- Milwaukee 2804-20: Clean chuck after each concrete use, calibrate battery every 3 months, and inspect spindle annually.
- Black+Decker BDD716C2: Replace battery every 2 years (average use), clean chuck monthly, and replace chuck if cracked.
A stuck impact drill bit is a frustrating issue, but with the right knowledge, tools, and techniques, it can be resolved safely and effectively. This guide has covered every aspect of stuck bit removal—from identifying root causes (e.g., debris, overheating, wear) to executing brand-specific solutions (for Bosch, DeWalt, Makita, Milwaukee, and Black+Decker models). We’ve also emphasized prevention strategies and post-removal troubleshooting, ensuring your drill remains reliable and free of stuck bits for years.
Remember, safety is always the first priority—disconnect power, wear PPE, and avoid excessive force when removing stuck bits. By following the maintenance checklist and using the correct bit for each material, you’ll minimize the risk of stuck bits and extend the life of your drill. Whether you’re a DIY enthusiast with a Black+Decker BDD716C2 or a professional with a Milwaukee 2804-20, the steps outlined in this guide will help you resolve stuck bits quickly and get back to your project.
This continuation completes the motor inspection section, expands into post-removal troubleshooting (damaged chucks, broken fragments, motor issues), and adds a final maintenance checklist to ensure long-term drill performance. If you’d like to dive deeper into a specific brand’s repair process (e.g., replacing a Bosch chuck) or need help troubleshooting a unique issue (e.g., a stuck bit in a vintage drill), feel free to share more details—I can tailor additional content to your needs.
