How to Install and Use a Cordless Mini Drill
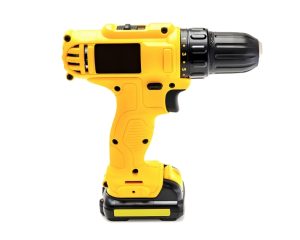
Cordless mini drills are versatile and handy tools suitable for a variety of household and DIY projects. Their portability and ease of use make them ideal for tasks ranging from assembling furniture to drilling holes in various materials. This guide will walk you through the process of installing, using, and maintaining a cordless mini drill, ensuring you can make the most of this practical tool.
Unboxing and Understanding the Components
When you first receive your cordless mini drill, it is crucial to familiarize yourself with all the components that come in the package. Typically, a cordless mini drill kit includes:
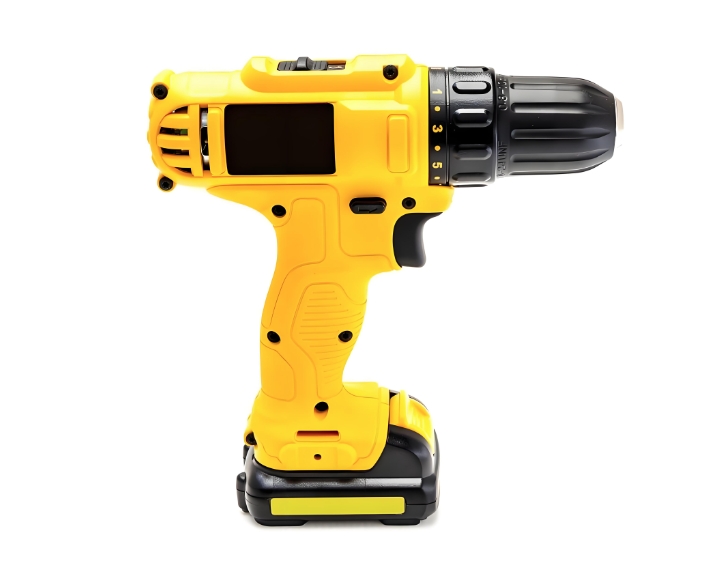
- The Drill: The main body of the drill, which houses the motor, battery, and control mechanisms.
- Battery Pack: The detachable and rechargeable battery that powers the drill.
- Charger: The device used to recharge the battery pack.
- Drill Bits: Various bits for different drilling and driving purposes.
- Manual: The user manual with detailed instructions and safety guidelines.
Charging the Battery
Before using the cordless mini drill, you need to ensure that the battery is fully charged. Follow these steps:
- Remove the Battery Pack: Detach the battery pack from the drill by pressing the release buttons on either side and sliding it out.
- Connect to Charger: Insert the battery pack into the charger. Ensure it is properly seated.
- Plug in the Charger: Connect the charger to a power outlet. A light indicator on the charger usually signifies the charging status.
- Wait for Full Charge: Allow the battery to charge completely, which can take a few hours depending on the battery capacity. The indicator light will typically change color or turn off when charging is complete.
Attaching the Battery
Once the battery is fully charged, reattach it to the drill:
- Align the Battery: Line up the battery pack with the slots at the base of the drill handle.
- Insert the Battery: Slide the battery pack into the handle until it clicks into place securely.
Choosing and Installing Drill Bits
Selecting the right drill bit for your task is crucial for achieving the desired results. Here’s how to install a drill bit:
- Select the Bit: Choose a drill bit that matches the material and size of the hole you want to drill.
- Open the Chuck: The chuck is the part of the drill that holds the bit. Rotate the chuck counterclockwise to open the jaws.
- Insert the Bit: Place the shank (the smooth part of the bit) into the chuck.
- Tighten the Chuck: Rotate the chuck clockwise to tighten the jaws around the bit. Ensure it is securely in place to prevent slipping during use.
Setting Up the Drill
Before starting your project, adjust the drill settings for optimal performance:
- Speed Settings: Most cordless mini drills have multiple speed settings. Select a lower speed for driving screws and a higher speed for drilling holes.
- Torque Settings: The torque control ring (usually located near the chuck) allows you to adjust the torque setting. Lower torque is suitable for softer materials, while higher torque is necessary for harder materials.
- Mode Selection: Switch between drilling mode and driving mode based on your task. Some drills have a hammer mode for masonry work.
Using the Drill
With the drill set up and the appropriate bit installed, you are ready to begin your project. Follow these safety and operational tips:
- Safety Gear: Always wear safety goggles to protect your eyes from debris. Hearing protection and gloves are also recommended.
- Mark the Spot: Use a pencil or marker to indicate where you want to drill or drive a screw.
- Pre-drill Holes: For screws, it is often helpful to pre-drill a pilot hole to prevent splitting the material.
- Firm Grip: Hold the drill firmly with both hands to maintain control.
- Start Slow: Begin drilling or driving at a low speed to ensure accuracy, then gradually increase the speed.
- Steady Pressure: Apply steady pressure without forcing the drill. Let the drill bit do the work.

Maintenance and Care
Proper maintenance ensures the longevity and optimal performance of your cordless mini drill:
- Regular Cleaning: After each use, clean the drill and bits to remove dust and debris. Use a dry cloth and a small brush for hard-to-reach areas.
- Battery Care: Avoid letting the battery discharge completely before recharging. Store the battery in a cool, dry place.
- Bit Sharpening: Keep drill bits sharp for efficient drilling. Dull bits can damage the drill and the material.
- Storage: Store the drill and accessories in a protective case to prevent damage and keep everything organized.
Troubleshooting Common Issues
Here are some common issues and solutions for cordless mini drills:
- Drill Won’t Start: Check if the battery is charged and properly inserted. If the problem persists, inspect the battery terminals for dirt or damage.
- Bit Slipping: Ensure the chuck is tightened securely. If the chuck is worn out, it might need replacement.
- Overheating: If the drill overheats, let it cool down before continuing. Continuous use in high torque settings can cause overheating.
- Reduced Battery Life: If the battery doesn’t hold a charge, it might be time for a replacement. Proper charging practices can extend battery life.
Advanced Tips for Better Drilling
- Pilot Holes: Drilling pilot holes for screws can make driving screws easier and prevent wood from splitting.
- Countersinking: Use a countersink bit to create a recess for screw heads, giving a flush finish.
- Depth Stop: If drilling multiple holes to the same depth, use a depth stop to ensure consistency.
- Bit Selection: For different materials, choose the appropriate bit. For example, use masonry bits for concrete, wood bits for timber, and metal bits for steel.
Conclusion
A cordless mini drill is an indispensable tool for any DIY enthusiast or homeowner. By understanding how to properly install, use, and maintain your drill, you can ensure its longevity and effectiveness for a wide range of projects. Always prioritize safety and follow the manufacturer’s guidelines to make the most out of your cordless mini drill. Happy drilling!

