Our Location
304 North Cardinal St.
Dorchester Center, MA 02124
304 North Cardinal St.
Dorchester Center, MA 02124
How to Install a Cross-Shaped Hammer Drill Bit: A Comprehensive Guide with Brand Recommendations
Installing a cross-shaped hammer drill bit correctly is essential for achieving optimal performance in masonry, concrete, and brick drilling tasks. This guide provides detailed step-by-step instructions, explores the technical specifications of cross-shaped bits, and recommends top brands and models to help you make an informed decision. Additionally, we’ll discuss key considerations for selecting the right bit for your project and provide maintenance tips to extend the lifespan of your tools.
Understanding Cross-Shaped Hammer Drill Bits
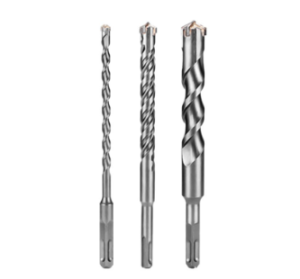
Cross-shaped hammer drill bits, also known as “four-flute” or “X-type” bits, are engineered for heavy-duty drilling in hard materials. Their unique design features four cutting edges arranged in a cross pattern, which enhances debris removal, reduces heat buildup, and improves drilling efficiency. These bits are commonly used with rotary hammer drills, which combine rotational force with a percussive action to break through tough surfaces.
The cross-shaped geometry provides several advantages over traditional two-flute bits:
Step-by-Step Installation Guide
Installing a cross-shaped hammer drill bit is straightforward, but it requires attention to detail to ensure safety and optimal performance. Follow these steps to install your bit correctly:
1. Select the Appropriate Bit
Before installation, choose a cross-shaped bit that matches your drilling requirements. Consider the following factors:
2. Prepare Your Drill
Ensure your rotary hammer drill is in good working condition before installing the bit:
3. Insert the Bit
The method for inserting the bit depends on the chuck type:
For SDS-Plus or SDS-Max Chucks:
For Hex Chuck Drills:
4. Adjust Drill Settings
Set your drill to the appropriate speed and impact settings for your material:
5. Test the Bit
Before drilling into your workpiece, perform a test on a scrap piece of similar material:
6. Begin Drilling
Once you’re satisfied with the test, proceed to drill your workpiece:
7. Monitor Bit Condition
During drilling, keep an eye on the bit’s condition:
8. Remove the Bit
After completing your drilling tasks, remove the bit safely:
Top Brands and Models of Cross-Shaped Hammer Drill Bits
Several reputable brands manufacture high-quality cross-shaped hammer drill bits. Here are some top recommendations:
1. Bosch
Bosch is a leading manufacturer of power tools and accessories, known for their durability and precision. Their cross-shaped hammer drill bits are designed for professional use and deliver exceptional performance in hard materials.
2. Hilti
Hilti is renowned for its high-performance construction tools and accessories. Their cross-shaped hammer drill bits are engineered for demanding professional environments and offer superior durability and precision.
3. DeWalt
DeWalt is a trusted name in power tools, offering a wide range of products designed for professionals and DIY enthusiasts alike. Their cross-shaped hammer drill bits are known for their reliability and value.
4. Makita
Makita is a global leader in power tool manufacturing, known for their innovative designs and high-quality products. Their cross-shaped hammer drill bits are engineered for performance and longevity.
5. Milwaukee
Milwaukee Tool is known for their rugged and reliable power tools, and their cross-shaped hammer drill bits are no exception. These bits are designed to tackle the toughest drilling tasks with ease.
Key Considerations When Selecting a Cross-Shaped Hammer Drill Bit
Choosing the right cross-shaped hammer drill bit involves evaluating several factors to ensure compatibility with your drill and suitability for your project. Here are some key considerations:
1. Material Compatibility
Ensure the bit is designed for the material you’ll be drilling. Cross-shaped bits are versatile but perform best in hard materials like concrete, brick, and stone. Some bits may be optimized for specific materials, so check the manufacturer’s recommendations.
2. Bit Diameter
Select a bit diameter that matches your hole size requirements. Common diameters range from 6 mm to 32 mm, with larger diameters suitable for anchoring or utility installations. Ensure your drill can accommodate the chosen bit diameter.
3. Bit Length
Choose a bit length that allows you to drill to your desired depth while providing enough shank length to secure it in the chuck. For deep holes, consider using extension bits or longer single bits to avoid the need for multiple drilling passes.
4. Shank Type
Verify that the bit’s shank type is compatible with your drill’s chuck. Common shank types include SDS-Plus, SDS-Max, and hex. Using the wrong shank type can result in poor bit retention, reduced performance, or safety risks.
5. Carbide Quality
The quality of the carbide inserts affects the bit’s durability and cutting performance. Look for bits with high-quality, precision-ground carbide tips that resist wear and maintain sharpness longer. Some bits feature reinforced carbide inserts for added durability in tough materials.
6. Flute Design
The flute design influences debris removal and heat dissipation. Bits with optimized flute designs, such as variable or spiral flutes, remove debris more efficiently, reducing heat buildup and extending bit life. This is especially important when drilling deep holes or in abrasive materials.
7. Brand Reputation
Choose bits from reputable brands known for their quality and reliability. Established brands often invest in research and development to create bits that perform better and last longer, providing better value over time.
Maintenance Tips for Cross-Shaped Hammer Drill Bits
Proper maintenance can significantly extend the lifespan of your cross-shaped hammer drill bits and ensure consistent performance. Here are some maintenance tips:
1. Clean Bits After Use
After drilling, remove debris from the bit’s flutes and cutting edges using a brush or compressed air. Accumulated debris can dull the bit and reduce its efficiency.
2. Store Bits Properly
Store your bits in a dry, protected place to prevent rust and damage. Consider using a dedicated bit case or organizer to keep them organized and easily accessible.
3. Inspect Bits Regularly
Periodically inspect your bits for signs of wear, such as rounded or chipped cutting edges. Replace worn bits promptly to avoid poor performance or damage to your drill.
4. Avoid Overheating
Excessive heat can dull the bit’s carbide inserts and damage the material being drilled. If the bit becomes hot during use, pause drilling to allow it to cool. Using a lubricant or water (when appropriate) can also help reduce heat buildup.
5. Use the Right Bit for the Job
Always use a bit designed for the material and application at hand. Using the wrong bit can cause premature wear, reduced performance, or even breakage.
6. Follow Manufacturer Guidelines
Adhere to the manufacturer’s recommendations for bit usage, maintenance, and replacement. Following these guidelines ensures optimal performance and safety.
Conclusion
Installing a cross-shaped hammer drill bit correctly is crucial for achieving efficient and precise results in masonry, concrete, and brick drilling tasks. By following the step-by-step installation guide provided in this article, you can ensure your bit is securely and properly installed, reducing the risk of accidents and improving drilling performance.
When selecting a cross-shaped hammer drill bit, consider factors such as material compatibility, bit diameter, length, shank type, carbide quality, and flute design. Reputable brands like Bosch, Hilti, DeWalt, Makita, and Milwaukee offer high-quality bits designed to meet the demands of professional and DIY users alike.
Proper maintenance, including regular cleaning, inspection, and storage, can extend the lifespan of your bits and ensure consistent performance over time. By investing in quality bits and following best practices for installation and maintenance, you can tackle even the toughest drilling tasks with confidence and efficiency.
For a wide selection of cross-shaped hammer drill bits and other drilling accessories, visit http://xiangriyang.com. Their extensive inventory and expert advice can help you find the right tools for your next project.
