Installing a hammer drill bit correctly is crucial for achieving precise, efficient, and safe drilling results, especially when working with hard materials like concrete, brick, or stone. This guide provides detailed, step-by-step instructions, illustrated with practical tips, and includes recommendations for top-rated hammer drill bits and compatible drills. Whether you’re a DIY enthusiast or a professional contractor, mastering this skill will enhance your project outcomes and tool longevity.
Understanding Hammer Drill Bits: Types, Materials, and Applications
Before diving into installation steps, it’s essential to understand the types of hammer drill bits available and their intended uses. Hammer drill bits are designed to withstand the high-impact forces generated by hammer drills, which combine rotational motion with percussive action to break through tough surfaces.
1. Carbide-Tipped Masonry Bits
Carbide-tipped bits are the most common choice for drilling into concrete, brick, and stone. The carbide tip is exceptionally hard and durable, resisting wear and maintaining sharpness even under extreme pressure. These bits are ideal for creating anchor holes, installing electrical conduits, or fitting fixtures in masonry walls.
Recommended Brands and Models:
- Bosch HC2081 1/2″ x 10″ SDS-plus Carbide Hammer Drill Bit: Known for its precision and durability, this bit features a reinforced carbide tip and a fluted design for efficient dust removal.
- Milwaukee 48-20-9011 SHOCKWAVE Carbide Hammer Drill Bit: Available in various sizes (e.g., 1/4″ x 4″ x 6″), this bit is engineered for high-performance drilling in concrete and masonry, with a shock-absorbing tip to reduce breakage.
- DeWalt DW5470 5-Piece Rock Carbide SDS Plus Hammer Bit Set: A versatile set for multiple hole sizes, featuring rock carbide tips for extended life in hard materials.
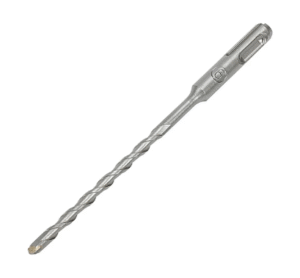
2. SDS (Slotted Drive System) Bits
SDS bits are designed specifically for use with SDS-compatible hammer drills, which feature a quick-change chuck system. These bits have grooves along the shank that lock into the drill’s chuck, providing better power transfer and reducing slippage during operation.
Recommended Brands and Models:
- Bosch BlueGranite Turbo Carbide Hammer Drill Bits: These SDS-plus bits feature a unique flute design for faster dust removal and a turbo-tip for enhanced breaking power.
- Hilti TE-YX 3/8″ x 12″ SDS-max Carbide Bit: For heavy-duty applications like drilling into reinforced concrete, this bit offers exceptional durability and precision.
- Makita B-65399 7-Piece SDS-Plus Drill Bit Set: A comprehensive set for various hole sizes, suitable for both professional and DIY use.
3. Multi-Material Bits
Some hammer drill bits are designed to handle multiple materials, including wood, metal, and masonry. While these bits offer versatility, they may not perform as well as specialized bits in each material type.
Recommended Brands and Models:
- Irwin Tools 3018002 3-Piece Multi-Material Drill Bit Set: Features a split-point tip for wood and metal, along with a carbide tip for masonry.
- DeWalt DWA1240 14-Piece Pilot Point Drill Bit Set: Includes bits for wood, metal, and plastic, with a carbide-tipped masonry bit for occasional concrete drilling.
Step-by-Step Guide to Installing a Hammer Drill Bit
Now that you’re familiar with the types of hammer drill bits, let’s walk through the process of installing one correctly. This guide assumes you’re using an SDS-compatible hammer drill, as these are the most common for masonry work.
Step 1: Gather Your Tools and Materials
Before starting, ensure you have the following:
- A compatible hammer drill (e.g., DeWalt DCH172, Bosch RH328VC, or Milwaukee 2712-20).
- The correct size and type of hammer drill bit for your project.
- Safety gear: safety glasses, hearing protection, and a dust mask.
- A marker or chalk for marking drilling locations.
- A punch or center drill bit for creating an indention (optional but recommended).
- A measuring tape or ruler for depth marking.
- A level or drill guide (optional for straight holes).
- A vacuum or brush for cleaning debris.
Step 2: Prepare the Work Area
- Clear the area: Remove any obstacles or debris around the drilling site to ensure a safe and stable working environment.
- Secure the workpiece: If drilling into a wall or floor, ensure the surface is stable. For smaller projects like drilling into a concrete block, place the block on a stable surface or clamp it down to prevent movement.
- Mark the drilling location: Use a marker or chalk to indicate where you want to drill. For precise holes, use a level or a drill guide to ensure straight lines. If drilling multiple holes, measure and mark each location carefully.
Step 3: Create an Indention (Optional but Recommended)
- Use a punch: Place the tip of a center punch or a small drill bit at the marked location and gently tap it with a hammer to create a small indention. This helps guide the larger drill bit and prevents it from wandering during startup.
- Alternative method: If you don’t have a punch, you can create a small dent by placing the tip of the hammer drill bit at the mark and applying light pressure while starting the drill briefly. Be cautious not to drill too deep at this stage.
Step 4: Insert the Drill Bit into the Chuck
- Locate the chuck release: On an SDS-compatible hammer drill, the chuck release is typically a button or lever near the front of the drill. Press or slide it to open the chuck.
- Insert the bit: Align the grooves on the SDS bit’s shank with the slots in the chuck and push the bit firmly into place until it clicks or locks securely.
- Verify the bit is secure: Give the bit a gentle tug to ensure it’s properly seated in the chuck. If it wobbles or comes loose, reinsert it and ensure the grooves align correctly.
Step 5: Adjust the Drill Settings
- Select the hammer mode: If your drill has multiple modes (e.g., drill-only, hammer drill, or rotary hammer), set it to hammer mode for masonry drilling. This activates the percussive action that helps break through hard materials.
- Set the speed: Many hammer drills have variable speed settings. For starting a hole, use a lower speed to gain control and prevent the bit from wandering. Once the bit has bitten into the material, you can increase the speed for faster drilling.
- Adjust the clutch (if applicable): Some drills have a clutch setting that limits the torque to prevent overdriving screws or damaging the bit. For drilling, you can usually set the clutch to its highest setting or a dedicated “drill” mode.
Step 6: Mark the Drilling Depth (Optional)
- Use tape or a marker: If you need to drill to a specific depth (e.g., for installing anchors), wrap a piece of masking tape around the bit at the desired depth mark. Alternatively, use a marker to draw a line on the bit.
- Alternative method: Some drill guides or depth stops can be attached to the bit or drill to ensure consistent hole depths.
Step 7: Begin Drilling
- Position the drill: Hold the drill with both hands, keeping your arms straight and your body balanced. For overhead drilling, use a ladder or step stool and maintain a firm grip on the drill.
- Align the bit: Place the tip of the bit at the marked location, ensuring it’s perpendicular to the surface (unless you’re drilling at an angle for a specific purpose).
- Start slowly: Press the trigger gently to start the drill at a low speed. Apply light to moderate pressure to the drill, allowing the bit to do the work. Avoid forcing the drill, as excessive pressure can cause the bit to bind or break.
- Increase speed gradually: Once the bit has gained purchase in the material, increase the speed to drill more efficiently. Keep the pressure steady and avoid sudden movements.
- Pause periodically: For deep holes, pause every few inches to withdraw the bit and clear out dust and debris. This helps prevent overheating and ensures smoother drilling.
Step 8: Complete the Hole
- Drill to depth: Continue drilling until you reach the desired depth, as marked by the tape, marker, or depth stop.
- Stop the drill: Release the trigger and allow the drill to come to a complete stop before lifting it out of the hole.
- Clean the hole: Use a vacuum, brush, or compressed air to remove any remaining dust or debris from the hole. This is especially important if you’re installing anchors or fasteners, as debris can interfere with their grip.
Step 9: Repeat for Additional Holes (If Needed)
If you need to drill multiple holes, repeat the process for each location, ensuring consistent depth and alignment. Use a drill guide or level to maintain straight lines if necessary.
Step 10: Remove the Drill Bit
- Release the chuck: Press or slide the chuck release button/lever to open the chuck.
- Remove the bit: Gently pull the bit out of the chuck and store it in a safe place. If you’re switching to a different bit size or type, follow the same insertion steps for the new bit.
Top Hammer Drill Brands and Models for Masonry Work
Choosing the right hammer drill is just as important as selecting the correct bit. Here are some top-rated hammer drills known for their performance, durability, and ease of use:
1. DeWalt DCH172 20V MAX XR Brushless SDS-Plus Rotary Hammer Drill
- Features: Brushless motor for extended runtime, 2.1 joules of impact energy, 3 modes (drill-only, hammer drill, chisel), and an SDS-plus chuck for quick bit changes.
- Best for: Heavy-duty masonry drilling, including concrete, brick, and stone.
- Why it stands out: Its compact size and lightweight design make it easy to handle, while its powerful motor delivers consistent performance even in tough materials.
2. Bosch RH328VC 1-1/8-Inch SDS-plus Rotary Hammer
- Features: 2.6 foot-pounds of impact energy, 3 modes (rotation only, rotary hammer, hammer only), and a vibration control system to reduce user fatigue.
- Best for: Professional contractors and serious DIYers working on large-scale masonry projects.
- Why it stands out: Its robust construction and high impact energy make it ideal for drilling into reinforced concrete and other demanding materials.
3. Milwaukee 2712-20 M18 FUEL SDS-Plus Rotary Hammer
- Features: POWERSTATE brushless motor, REDLINK PLUS intelligence for optimal performance, and 1.7 foot-pounds of impact energy.
- Best for: Users who need a balance of power and portability, with the added benefit of Milwaukee’s M18 battery system for compatibility with other tools.
- Why it stands out: Its compact design and advanced electronics provide smooth operation and long tool life.
4. Makita XRH04Z 18V LXT Lithium-Ion Brushless Cordless 7/8-Inch SDS-Plus Rotary Hammer
- Features: Brushless motor, 3 modes, and efficient dust extraction capabilities (when used with a compatible dust attachment).
- Best for: Users who prioritize cleanliness and reduced dust exposure, such as those working indoors or in sensitive environments.
- Why it stands out: Its dust management system helps maintain a cleaner work area and reduces health risks associated with inhaling concrete dust.
5. Hilti TE 6-A36 Cordless Rotary Hammer Drill
- Features: 36V battery system, 2.5 foot-pounds of impact energy, and Active Vibration Reduction (AVR) technology for reduced user fatigue.
- Best for: Professional contractors working on high-demand projects where power and durability are critical.
- Why it stands out: Hilti is known for its high-quality construction tools, and the TE 6-A36 is no exception, offering exceptional performance and reliability.
Safety Tips for Using Hammer Drills and Bits
Working with hammer drills and masonry bits involves inherent risks, so it’s essential to follow safety guidelines to protect yourself and others. Here are some key safety tips:
- Wear appropriate safety gear: Always wear safety glasses to protect your eyes from flying debris, hearing protection to reduce noise exposure, and a dust mask to prevent inhalation of concrete dust.
- Secure the workpiece: Ensure the material you’re drilling into is stable and won’t move during operation. Use clamps or a vice to hold smaller pieces in place.
- Avoid excessive force: Let the drill do the work by applying steady, even pressure. Forcing the drill can cause the bit to bind or break, leading to potential injury.
- Keep hands and loose clothing away from moving parts: Never place your hands near the chuck or bit while the drill is running, and avoid wearing loose clothing that could get caught in the tool.
- Use the correct bit for the material: Using a wood or metal bit for masonry drilling can damage the bit and the drill, and may result in poor performance or injury.
- Disconnect the power before changing bits: If you’re using a corded drill, unplug it before changing bits or making adjustments. For cordless drills, remove the battery.
- Store bits properly: Keep drill bits in a designated case or holder to prevent damage and ensure they’re easy to find when needed.
- Inspect bits regularly: Check for signs of wear, such as chipped or dull tips, and replace damaged bits immediately to maintain optimal performance and safety.
Troubleshooting Common Issues When Installing Hammer Drill Bits
Even with proper technique, you may encounter some issues when installing hammer drill bits. Here are solutions to common problems:
1. The Bit Wanders During Startup
- Cause: The bit isn’t properly aligned with the marked location, or the surface is too smooth for the bit to gain traction.
- Solution: Create an indention using a punch or center drill bit to guide the larger bit. Alternatively, place a piece of painter’s tape over the mark to provide better grip.
2. The Bit Gets Stuck in the Hole
- Cause: The bit may bind due to excessive pressure, a dull tip, or drilling at an angle.
- Solution: Release the trigger and allow the drill to stop completely. Gently wiggle the bit back and forth while pulling upward to free it. If the bit is dull, replace it with a new one.
3. The Hole is Not Straight
- Cause: The drill wasn’t held perpendicular to the surface, or the bit was bent or damaged.
- Solution: Use a drill guide or level to ensure straight drilling. Inspect the bit for damage and replace it if necessary.
4. The Drill Overheats
- Cause: Drilling for extended periods without pausing to clear debris can cause the bit and drill to overheat.
- Solution: Pause every few inches to withdraw the bit and clear out dust. For deep holes, consider using a bit with a fluted design for better dust removal.
5. The Bit Breaks
- Cause: Using excessive force, drilling into reinforcing bars (rebar), or using a dull or damaged bit can cause it to break.
- Solution: Drill slowly and apply steady pressure. If you encounter rebar, switch to a rebar-cutting bit or relocate the hole if possible. Always use sharp, undamaged bits.
Advanced Techniques for Professional Results
For those looking to take their hammer drilling skills to the next level, here are some advanced techniques:
1. Using a Drill Guide for Perfectly Straight Holes
A drill guide is a tool that helps maintain the drill’s alignment, ensuring straight holes every time. It’s especially useful when drilling multiple holes in a row or when precision is critical (e.g., for installing pool fencing or shelving).
- How to use a drill guide:
- Attach the guide to your marked location using clamps or adhesive strips.
- Adjust the guide’s leveling bubbles to ensure it’s perfectly horizontal or vertical.
- Insert the drill bit through the guide’s sleeve and drill as usual, keeping the drill pressed firmly against the guide.
2. Drilling into Reinforced Concrete
Reinforced concrete contains steel rebar, which can damage standard masonry bits. For drilling into rebar, use a rebar-cutting bit or a rotary hammer drill with a carbide-tipped bit designed for reinforced materials.
- Tips for drilling into rebar:
- Start with a smaller bit to create a pilot hole, then switch to a larger bit if needed.
- Drill slowly and apply steady pressure to avoid breaking the bit.
- If the bit hits rebar, pause and assess whether to continue drilling through it or relocate the hole.
3. Creating Clean, Deep Holes
For deep holes (e.g., for anchoring large fixtures or installing electrical conduits), use a long carbide-tipped bit and pause periodically to clear debris. You can also use water to lubricate the bit and reduce dust, but be cautious as water and electricity don’t mix if you’re using a corded drill.
- Tips for deep holes:
- Use a bit with a fluted design for better dust removal.
- Withdraw the bit every few inches to clear debris.
- Consider using a rotary hammer drill for deeper holes, as they provide more impact energy.
4. Drilling at an Angle
Some projects require drilling holes at an angle (e.g., for installing shelves or brackets). To drill at an angle:
- Mark the drilling location and angle using a protractor or angle finder.
- Use a drill guide or a piece of wood as a makeshift guide to maintain the correct angle.
- Drill slowly and carefully, ensuring the bit stays aligned with the marked angle.
Conclusion: Mastering the Art of Installing Hammer Drill Bits
Installing a hammer drill bit correctly is a fundamental skill for anyone working with masonry or hard materials. By following the steps outlined in this guide—from selecting the right bit and drill to using proper technique and safety measures—you can achieve professional-quality results with minimal effort and risk.
Remember to choose high-quality bits from reputable brands like Bosch, Milwaukee, DeWalt, or Makita, and pair them with a compatible hammer drill that suits your project needs. Whether you’re a DIY enthusiast tackling a home improvement project or a professional contractor working on large-scale construction, mastering the art of installing hammer drill bits will serve you well for years to come.
By investing time in learning these techniques and practicing safe drilling habits, you’ll not only improve the quality of your work but also ensure a safer and more enjoyable experience every time you pick up a hammer drill. Happy drilling!
