What to Do If the Impact Drill Bit Is Not Installed Properly: A Comprehensive Guide
When using an impact drill, encountering issues with the drill bit installation can be frustrating and potentially dangerous. A drill bit that is not installed correctly may lead to poor performance, damage to the drill or workpiece, or even personal injury. This guide will provide detailed steps to address improper drill bit installation, along with an overview of popular impact drill brands and models, ensuring you can resolve the issue efficiently and safely.
Understanding the Problem: Signs of Improper Drill Bit Installation
Before diving into solutions, it’s essential to recognize the signs that indicate your drill bit is not installed correctly. Common indicators include:
- Excessive Vibration: If the drill vibrates more than usual during operation, it may be due to a loose or misaligned drill bit.
- Unusual Noises: Grinding or rattling sounds can suggest that the drill bit is not seated properly in the chuck.
- Poor Drilling Performance: The drill bit may not penetrate the material effectively, or it may wander off the intended drilling path.
- Visible Damage: Check the drill bit and chuck for any signs of wear or damage that could prevent proper installation.
If you notice any of these signs, it’s crucial to stop using the drill immediately and address the issue before continuing.
Step-by-Step Guide to Fixing Improper Drill Bit Installation
Step 1: Disconnect the Drill from Power
Safety should always be your top priority. Before attempting to fix the drill bit, ensure that the drill is disconnected from its power source. For corded drills, unplug the power cord. For cordless drills, remove the battery pack. This step prevents accidental activation of the drill while you’re working on it.
Step 2: Inspect the Chuck and Drill Bit
Carefully examine the chuck (the part of the drill that holds the drill bit) and the drill bit itself. Look for any visible damage, such as cracks, chips, or excessive wear. If either the chuck or the drill bit is damaged, it may need to be replaced.
Step 3: Clean the Chuck and Drill Bit
Dirt, debris, or residue can accumulate in the chuck or on the drill bit, preventing proper installation. Use a clean cloth or brush to wipe down both the chuck and the drill bit, removing any contaminants that could interfere with a secure fit.
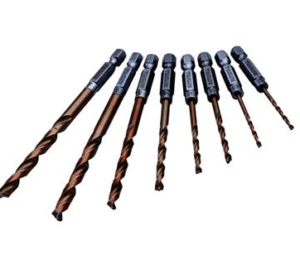
Step 4: Choose the Correct Drill Bit Size and Type
Ensure that you’re using the correct size and type of drill bit for your specific application and the drill’s chuck capacity. Using an incompatible drill bit can lead to installation issues and poor performance. Refer to the drill’s user manual for guidance on selecting the appropriate drill bit.
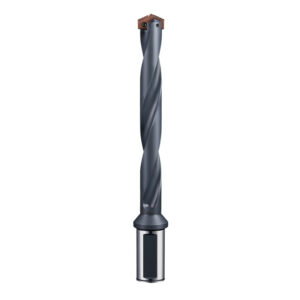
Step 5: Install the Drill Bit Correctly
The method for installing a drill bit varies slightly depending on whether your drill has a keyed or keyless chuck.
For Keyed Chucks:
- Locate the chuck key that came with your drill. It should fit into the holes on the side of the chuck.
- Insert the chuck key into one of the holes and turn it counterclockwise to loosen the chuck jaws.
- Once the jaws are loose enough, insert the drill bit shank (the smooth part of the drill bit) into the chuck, ensuring it’s centered and straight.
- Tighten the chuck jaws by turning the chuck key clockwise. Make sure to tighten all the holes evenly to ensure a secure grip on the drill bit.
- Give the drill bit a gentle tug to confirm that it’s securely installed.
For Keyless Chucks:
- Grasp the chuck with one hand and the drill’s handle with the other.
- Rotate the chuck counterclockwise to loosen the jaws. Some keyless chucks may have a locking mechanism that needs to be engaged first; refer to your drill’s user manual for specific instructions.
- Insert the drill bit shank into the chuck, ensuring it’s centered and straight.
- Tighten the chuck jaws by rotating the chuck clockwise. Apply firm pressure to ensure a secure grip on the drill bit.
- Test the drill bit by giving it a gentle tug to confirm that it’s properly installed.
Step 6: Test the Drill
After installing the drill bit, reconnect the drill to its power source (plug in the power cord or reinsert the battery pack). Turn on the drill at a low speed and observe its operation. Check for any signs of vibration, unusual noises, or poor performance. If everything appears normal, you can proceed with your drilling task.
Popular Impact Drill Brands and Models
When it comes to impact drills, several brands stand out for their quality, performance, and reliability. Here are some of the most popular brands and models, along with their key features:
Milwaukee
Milwaukee is renowned for its durable and high-performance power tools, and its impact drills are no exception.
- Milwaukee 2804-20 M18 FUEL 1/2″ Hammer Drill: This cordless hammer drill features a POWERSTATE brushless motor that delivers up to 1,200 in-lbs of torque, making it ideal for heavy-duty drilling applications. It also has REDLINK PLUS intelligence, which provides optimized performance and overload protection.
- Milwaukee 2704-20 M18 FUEL 1/2″ Hammer Drill/Driver: Another cordless option from Milwaukee, this drill/driver combines the power of a hammer drill with the versatility of a drill/driver. It features a brushless motor and REDLINK PLUS intelligence for efficient performance.
DeWalt
DeWalt is a well-known brand in the power tool industry, offering a wide range of high-quality impact drills.
- DeWalt DCD991P2 20V MAX XR Brushless 1/2″ Hammer Drill/Driver Kit: This cordless hammer drill/driver kit includes a brushless motor that provides up to 820 unit watts out (UWO) of power, making it suitable for a variety of drilling tasks. It also has a 3-speed, all-metal high-performance transmission for optimized application speed and control.
- DeWalt DCD791D2 20V MAX XR Brushless 1/2″ Compact Drill/Driver Kit: If you’re looking for a more compact and lightweight option, this drill/driver kit is a great choice. It features a brushless motor and a compact design that makes it easy to maneuver in tight spaces.
Black+Decker
Black+Decker offers a range of affordable and user-friendly impact drills that are perfect for DIY enthusiasts and homeowners.
- Black+Decker LDX120C 20V MAX Lithium-Ion Cordless Drill/Driver: This cordless drill/driver is lightweight and easy to use, making it ideal for basic drilling tasks around the house. It features an 11-position clutch to prevent stripping screws and overdriving, and it comes with a 20V MAX lithium-ion battery for long-lasting performance.
- Black+Decker BDCD8PK 20V MAX Cordless Drill/Driver with Project Kit: This drill/driver comes with a comprehensive project kit that includes a variety of drill bits, screwdriver bits, and other accessories, making it a great value for DIYers. It features a variable-speed trigger for precise control and a keyless chuck for easy bit changes.
Ryobi
Ryobi is known for its innovative and budget-friendly power tools, and its impact drills are no exception.
- Ryobi P252 18V ONE+ Lithium-Ion Brushless 1/2″ Hammer Drill/Driver: This cordless hammer drill/driver features a brushless motor that provides up to 750 in-lbs of torque, making it suitable for a variety of drilling applications. It also has a 24-position clutch and a 2-speed gearbox for optimized performance.
- Ryobi P208 ONE+ 18V Lithium-Ion Cordless Drill/Driver: If you’re looking for a basic and affordable cordless drill/driver, this model is a great choice. It features a variable-speed trigger for precise control and a keyless chuck for easy bit changes. It’s also compatible with Ryobi’s ONE+ battery system, which allows you to use the same battery across a wide range of Ryobi tools.
Additional Tips for Proper Drill Bit Installation and Maintenance
In addition to following the steps outlined above, here are some additional tips to ensure proper drill bit installation and maintenance:
- Store Drill Bits Properly: Keep your drill bits organized and stored in a dry, clean place to prevent damage and corrosion. A drill bit index or case is a great way to keep your bits organized and easily accessible.
- Inspect Drill Bits Regularly: Before each use, inspect your drill bits for any signs of damage or wear. Replace any damaged or worn bits immediately to prevent accidents and ensure optimal performance.
- Use the Correct Drilling Technique: Proper drilling technique can help prevent drill bit installation issues and improve performance. Start drilling at a low speed and gradually increase the speed as needed. Apply steady pressure and avoid forcing the drill bit into the material.
- Lubricate the Chuck: If your chuck seems stiff or difficult to operate, a small amount of lubricant can help. Apply a few drops of lubricating oil to the chuck jaws and operate the chuck back and forth to distribute the oil evenly.
- Follow the Manufacturer’s Instructions: Always refer to the manufacturer’s instructions for your specific impact drill model for guidance on proper installation, operation, and maintenance. Different models may have slightly different requirements and features.
Conclusion
Improper drill bit installation can be a frustrating issue, but with the right knowledge and steps, it’s relatively easy to resolve. By following the step-by-step guide outlined in this article, you can ensure that your drill bit is installed correctly and securely, preventing accidents and improving performance. Additionally, familiarizing yourself with popular impact drill brands and models can help you make an informed decision when purchasing a new drill or replacing an existing one. Remember to always prioritize safety when using power tools and to follow the manufacturer’s instructions for proper operation and maintenance. With these tips and guidelines, you’ll be well-equipped to tackle any drilling task with confidence and ease.
For purchasing drill bits and other related accessories, you can visit http://xiangriyang.com for a wide selection of high-quality products.
